Last week we played a game between Alexander the Great and King Porus.
This week we decided to go with a high Medieval battle between the Kingdoms of England and Scotland, with two standard sized Warband armies, at 500pts apiece.
The English were created from the list "Britain, English [1182-1337AD]", and consisted of:
Richard I (in command)
5 units of heavy knights (one with a sub-commander)
3 units of longbowmen
1 unit of archers
2 units of spearmen
The Scottish were created from the list "Britain, Scottish Medieval [1125-1513AD]", and consisted of:
William the Lion in schiltron (in command)
4 units of schiltron spears
2 units of archers
2 units of spearmen
2 units of knights (one with a sub-commander)
1 unit of light archers
(We forgot to bring baggage elements!)
We generated the terrain and on the western flank there was a small hill and a couple of areas of waterlogged ground; otherwise the eastern flank was a large open area of good ground. Perfect for the heavy troops of both armies!
Then we generated the season and weather to find the battle being fought in spring, near a town somewhere in the northern marches. As typical for this part of the world, it was raining and had been for a while and so another area of marshy ground terrain was randomly placed. As it turned out it fell on the western flank too!
 |
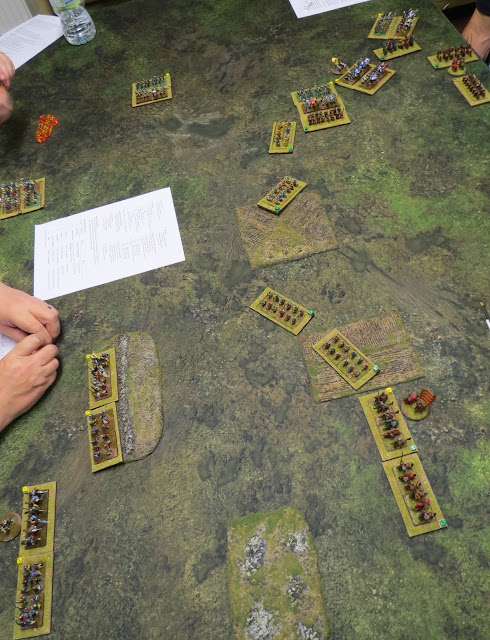
| The two armies arrayed and ready for battle. |
 |
| The mighty Scots schiltron; deep formations of spearmen. |
 |
| The rest of the Scots line, formed up among the rough terrain, |
 |
| Richard I himself, at the western end of the English line. |
 |
| In what would become a familiar action, the longbowmen shot the Scottish skirmishers to bits, routing them and forcing them to flee. |
 |
| The schiltron |
These heavy Scottish troops advanced into the English knights arrayed before them. The knights, seeing the clattering spears, immediately turned and marched west, to try to avoid battle here. In a typical display of feudal squabbling however, the move was uncoordinated and many of the straggling knights were caught in the open.
As the schiltrons closed into melee range, their formation broke up and the general's command capacity began to break down. Although they did good work among the English knights, the schiltrons' inherent lack of mobility saw them struggle to manoeuver under their unit leader's commands.
The rest of the Scottish line stepped forwards to attamept to pin the English western line; but frankly all they did was make themselves targets for the lethal English longbows!
And the English longbows made hay among the Scots for sure. Thelongbows and spearmen turned east to protect the retreat of their knights, and also to pour devastating volleys into the schiltrons.
 |
| The knights beaten, the Scottish general now struggled to restore order or get his schiltrons to move at all! The Scottish advance grinds to a halt... |
The tide of the battle starts to turn, as the English forces now smash into the schiltrons. Knights and speamen mix it up in melee as the archers scatter and rout half the Scottish pikes.
 |
| The tide is turning... |
 |
| ..and the English take the centre ground. |
But both armies have taken heavy losses in the bitter fighting and both are close to morale collapse. Its still all to play for at this stage. The surviving schiltrons, including the Scottish general, prove more than a match for the English, and start to get the upper hand, breaking the English spearmen and tearing the knights to shreds.
Richard I orders his longbowmen forwards into the western end of the Scottish lines, where for most of the day they'd hidden behind a hill to avoid the devastating English archery.
Both sides are now looking for those final few casualties that would break the opposing army and secure the win.
The English archery starts to tell and the Scots fall back in disarray.
Richard himself leads the charge, spurring on his archers, and as the two lines close, losses mount and in the same turn both armies break!
The result couldn't be closer and we tally the losses to see which side has scored the Pyrrhic victory...
And by about 25 points, the Scots drag out a bitter, attritional win!
All round it was an excellent battle with the fortunes of war swinging back and forth throughout the game. The Scottish had the better of the early game with the schiltron winning the eastern flank. The English recovered well and mounted a solid counter attack as the schiltron lost control and all but stopped moving. And in the final phase, it was a stand-up, knock-down brawl with both sides giving no quarter. It really could have gone both ways and it was all down to the losses inflicted in the final count.
Rules review I was pleased the way the various units interacted. The schiltron clearly beat the knights, but the English longbowmen caused havoc among the schiltron in return, especially with King Richard personally taking command of them and inspriing their archery.
Both armies had their commanders on one flank (the opposite to each other as it happens), and both sides found this a significant difficulty as they couldn't spread their command points where they were needed effectively. Sub-commanders were in play which helped a little.
Its fair to say that during the excitement and heat of battle, we all forgot and missed a variety of conditional modifiers and combat factors; the main effect of which was to extend the length of the game by about 3-4 turns. Both armies would probably have broken earlier.
Next week - Mongol Golden Horde vs the Seljuk Turks.


Great report, nice to see a flavourful report too
ReplyDeleteI hope these rules will be published one day
ReplyDelete