For those of you who are unfamiliar with the jolly little concept you can find a great deal of information here.
The basic premise is that King Edward married Wallace Simpson, refused to abdicate and when Parliament refused to sit to force his hand, he invited Oswald Moseley’s British Union of Fascists to form a government. Outraged, this pushed the country into “A Very British Civil War”.
From a wargamer’s perspective, this simple background allows a wonderful flight of fantasy that is semi-grounded in the militarily bizarre “inter war period” and further spiced with the wonderful flavour of “Britishness”. This freedom then intertwines with the possibilities of researching the local history of the area you live in (for those of us in the UK of course!) and building a joyous eclectic army from this imagined history, as we have. I really can't believe its been seven years since we dipped our toes into this setting.
So lately we've been dabbling in various little themed skirmish games using the old Mordheim rules, and so this week I decided to put together a long overdue return to the war in Durham in 1938. Our gmes back then expanded in size and scope so I took the chance to scale things back again with a simple scenario. We've found with multi-player games and around 30 figures per side the Mordheim rules work really well.
So I put together some basic rules for 1930's weapons, and a simple scenario and we dived in!
10th November 1938
The weather is coming in now, with cold and wet conditions making life miserable. Everyone is talking about snow. At a road junction just south of Plawsworth and east of Tan Hills, a Communist Austin-Kegresse “tank” has broken down, while on manoeuvres on the edge of Lambton’s Territory near Great Lumley.
The crew abandoned the behemoth and made for the small garrison at Sacriston, where they’ve picked up a local mechanic and a platoon of “red hats” (militia). The militia, led by Comrade Harold MacDairmid is now on the march back to secure the vehicle.
The Plawsworth LDV, mostly independent, but certainly Royalist and sympathetic to Lord Lambton, have watched this with interest from their houses in Plawsworth and have quickly mustered their numbers. The local “commander” Jack Thubron intends to capture the tank for the LDV, or at least destroy it so the “Lefties” can’t use it.
The battle was to take place between a small foce of Chopwell Communists and the Palwsworth LDV.
The players were given the following details.
Chopwell Communists
“You could’ve picked a better day for it Hal”. “Quit your twistin’ Jerry. Let’s just get this done”. The platoon trudged down the road out of Tan Hill, their red-painted tin hats dinging with freezing rain. Moods were foul, and rifles shouldered. Nobody wanted to be out in weather like this, but the border patrol had broken down and left one of the highly prized armoured cars out by the Red Lion. There were mutterings of “we’re due a pint for this like”. The orders were simple; get to the crossroads, guard the little tank while Jerry Blackthorn fixed the damn thing. The scout riders spurred their mounts on down the road to make sure the way was clear. What could go wrong?
Scenario rules
Bad weather!
It’s cold and raining hard, making life miserable for everyone. Visibility (and therefore weapon ranges) are limited to 24”
The Red Lion
The Red Lion pub is neutral ground. No model can approach closer than 2” to the pub, and no shooting attack can pass within 2” of it.
Forces
You have a platoon of 31 men under your command as follows:
1x Commander (Harold MacDairmid) – SMG
1x Mechanic (Jerry Blackthorn) – hand weapon (big spanner)
4x Tank crew – revolver
2x Leaders – rifle & bayonet
17x Comrades - rifle & bayonet
1x Comrade – Lewis gun
1x Mounted Leader – horse, carbine & sword
4x Mounted Comrades – horse, carbine & sword
You may organise your forces as you wish, but the mounted troops must operate together as a unit separate from the infantry.
You must begin taking Rout tests for your force once 8 or more fighters are taken Out of Action.
Deployment
You deploy after the LDV.
The mounted troops have been sent to scout ahead and deploys anywhere within 6” of the West table edge.
At the start of your second turn, the rest of your force arrives. When they do:
Your Commander, Mechanic and tank crew deploy within 6” of the western table edge and no further than 6” from the Tan Hill road.
All other troops deploy within 6” of the western table edge and no further than 12” from the Tan Hill road.
The LDV begin the first turn.
Winning the battle
You win the battle if any of the following occurs:
- The Plawsworth LDV rout from the field and the objective (the Austin-Kegresse AC) is not wrecked; or
- The objective is recovered.
The Austin-Kegresse must be repaired. It’s a relatively simple job in a garage, but less so in the midst of a firefight! Your mechanic can get the blessed thing going again with the kit he has with him but to do so, he must spend an entire turn in contact with the vehicle figuring things out. At the end of that turn, he gets the engine going on a 5+. Once started, as long as you have at least 1 tank crewmember within the vehicle, it counts as being recovered (it can be driven off in relative safety).
Occupying the objective
Up to 4 men can enter the objective (preferably the tank crew!). To do so, they must begin their movement in contact with the vehicle. The mounted troops can’t do this. Two can operate the two turrets. Your men’s unfamiliarity with it means they must spend an entire turn within the vehicle figuring things out. Thereafter, they can fire the MGs. Two MGs can fire into the forward and read 45° arcs. Only one can fire into each side arc. The tank crew are skilled at operating the little tank and can man the turrets (and begin driving the thing once it’s repaired), the turn after they clamber in. Only the tank crew know how to drive the thing. The Austin-Kegresse AC treats all terrain as open, but cannot “run”. If during its move it contacts any other model, that model is displaced the minimum distance to let the AC pass. Nobody wants to get run over!
Plawsworth Local Defence Volunteers (LDV)
“What we doin’ then Jack?” Freezing rain dripped off his nose as the volunteer as he looked for instructions from “Commander” Jack. “Listen boys, tha’ Red Hat lefties left that little tank down there on the road. Barney was in the Red Lion and says it conked out! The Reds’ll be along for it soon I reckon, so let’s get down there and see what we can do eh?” Another couple of volunteers arrived carrying a crate of petrol bombs. Jack ordered them distributed and said, “And if we can’t capture the damn thing, we’ll make sure that Chopwell lot don’t get it back.” The orders were simple; get down there and set that little tank on fire.
Forces
You have a platoon of 31 men under your command as follows:
1x Commander (Jack Thubron) – revolver & hand weapon
2x Leaders – rifle & hand weapon
14x Volunteers – rifle & hand weapon
6x Volunteers – rifle, hand weapon & firebomb
6x Volunteers – rifle, hand weapon & wrecker’s tools
1x Volunteer – Lewis gun, revolver
1x Volunteer (sniper) – rifle, hand weapon
You may organise your forces as you wish.
Break Point
You must begin taking Rout tests for your force once 8 or more fighters are taken Out of Action.
Deployment
You deploy before the Communists. All your fighters must deploy within 6” of the eastern table edge.
Up to six fighters may be “hidden”; they do not deploy at the start of the battle. Instead, at the start of any of your turns, you may deploy any or all of them onto the table. Hidden troops may be deployed in this way on one or over many turns.
These models may not be placed closer than 9” to any enemy model or within 18” of the Objective (Austin-Kegresse “tank”).
You begin the first turn.
Winning the battle
You win the battle if any of the following occurs:
- The Communists rout from the field and the objective (Austin-Kegresse AC) is not wrecked; or
- The objective is wrecked.
The objective may be attacked by weapons are normal. It counts as a large target, and never counts as in cover. Your fighters carry very few weapons that can actually harm the objective! The Lewis gun may do, but the best option are the fighter’s who’ve had the presence of mind to bring wrecking tools.
Occupying the objective
Up to 4 men can enter the objective. Two can operate the two turrets. However, due to your men’s unfamiliarity with it they must spend an entire turn within the vehicle figuring things out. Thereafter, they can fire the Vicker’s machineguns in the turret. None of them will have the wherewithal to figure out how to drive the little tank even if it was working.
To the Battle
This engagement takes place at the crossroads of the Red Lion pub, between the villages of Tan Hill and Plawsworth just north of Durham City.
We set up the table according to the maps we found of the area from 1940:


Here's the Red Lion today...

As there were a few "surprisies" in store during the scenario, I umpired the game and handed the two forces to the four other players and we set about the battle.
I tried to develop a scenario that would be balanced and equally challenging for both sides. It was very interesting to watch the players decide how to fight the battle, which was not the way I'd expected it to go down!
OK, so the forces deployed in accordance with their instructions, in the freezing winter rain.

 |
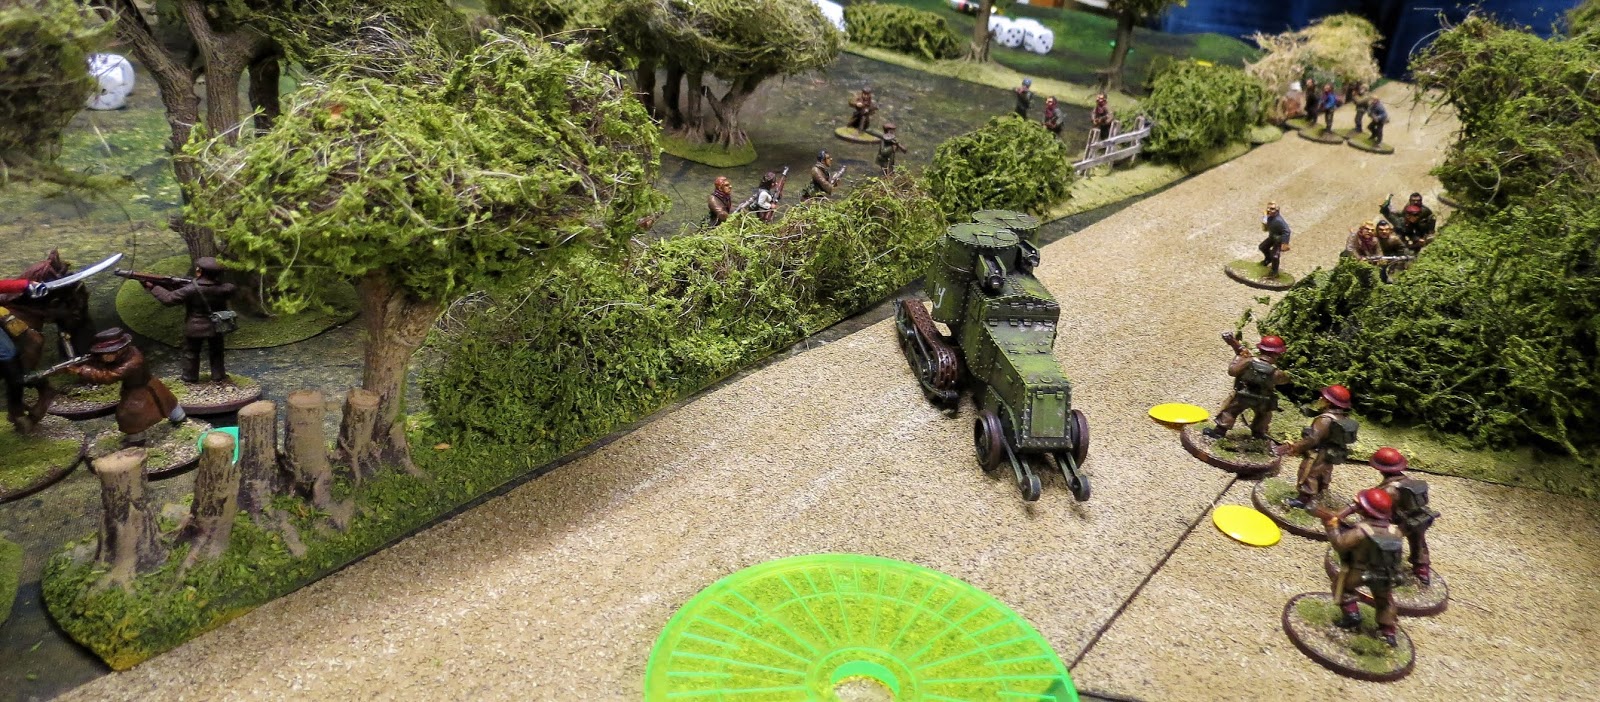
| The Reds broken down "little tank" |

 |
| The Plawsworth LDV make their way west out to the Red Lion junction. |
In the opening actions, the Communists threw their vulnerable mounted infantry forwards to check out the stranded Austin-Kegresse armoured car. Unfortunately, one of their number saw that the Red Lion was open and peeled off to make his way to the warmth of the bar, never to return to the battle! They're quickly followed by the arrival of the Red infantry, who decided to split up and send the bult of their riflement on a long march around the hallowed ground of the pub. The smaller part pushed forwards across the sodden southern fields to try to get to the tank.


 |
| The forces make their opening moves |
 |
| The Communist riflemen head out on a long march to the north around the pub. Its a move that keeps them out of the fight for much of the battle. Luckily, their leader manages to keep the cold, wet comrades from heading into the pub to seek a warm fire and a nice warm pint. |

 |
| Meanwhile the Plasworth LDV take up highly effective positions in the centre of the battle, to the east of the Red Lion. their riflemen are supported by the wreckers, ready to swarm onto the tank to smash it up. |


Then the LDV make their move with their brave youngsters storming across the road to lob the terrible Molotov cocktail firebombs in amongst the Chopwell red hats. They are devastating, killing several men in the most awful way, and causing the Communist morale to waver here quite badly.

 |
| The tank crew are dressed in local police uniforms, because why not? |
At this stage of the battle, things looks bad for the Communists. their losses were mounting, and outgunned at the critical point of engagement, the LDV firebombers had nearly caused them to break. But now, the Red Hat northern flanking move began to develop.


And at this time, both sides lost enough of their force to have to start taking Rout tests. The LDv were up first for the test, promptly failed and routed away from the fight!
It was an incredibly close battle at the then and and a lot of fun!
 |
| As the fighting died down, a local came trundling down the road, going about their business in these troubled times... |
So at the end it was an excellent fight that could have gone either way. Luck and timing saw the Chopwell Communists holding the field and therefore able to recover their little tank.
Victory to the Soviet!!