Saturday 14 December 2013

The History of the British Civil War in the North East (abridged; the road to High Hold)

https://i.ytimg.com/vi/9PtrEqvBy8c/maxresdefault.jpg

1938 was a year of escalating conflict in the north east of England, and that conflict was focussed mainly around the areas to the north and west of Durham.  The conflict had humble origins, beginning with a short and inconclusive exchange of fire between some arms smugglers and the police at a roadblock near Rothbury, but those first shots ignited a terrible series of battles that became ever larger and more costly for all involved.

https://www.northumberlandnationalpark.org.uk/places-to-visit/coquetdale/rothbury/

Three main factions emerged during these early months of the war; the Communist forces commanded from the small mining village of Chopwell, the British Union of Fascists (BUF) garrisoned at Gateshead, and the private army of Lord John Lambton, the 5th Earl of Durham.  The so-called ‘Lambton’s Hounds’


The Communists at Chopwell came to prominence under the leadership of ‘Chief Comrade’ John Harding, a famously hard-drinking farmer and Socialist.  After the dissolution of Parliament, Harding organised local Marxist sympathies into a cohesive force around Chopwell and spent the early part of 1938 looting banks, businesses, and local wealthy properties and families.  The Communists called this the ‘great redistribution’ and it gave them tremendous economic and political power during the initial period of ‘phoney conflict’.  They used some of the money to provide social services to the local population and set up community restaurants, civil defence volunteer organisations, and collective farms.  However, much of it was reserved for the coming war effort, and their early attempts to acquire arms brought them into unproductive contact with the Northumberland Freedom Fighters (involved in the incident at Rothbury).  The Communists attempted to open a supply route to Russia along the River Tyne.  However, the Royalist military to the north, and the BUF at Gateshead successfully closed off this option.  Harding turned to the Comrades down in the Free City of Liverpool and was able to establish a fairly stable supply corridor up through Alston.  As the year progressed, the forces at Chopwell were significantly bolstered with Russian materiel including advisors, small arms, heavy guns, mortars, and even T26 tanks.  By the end of 1938, the Chopwell militia were as well supplied as any army in Britain at the time.

The King and Prime Minister Moseley were very concerned about the potential loss of the Durham coalfield and early in the war they despatched a contingent of BUF troops under the command of Arthur Wendbury-Pace.  These forces were drawn from Essex and Suffolk and were garrisoned in Gateshead, near the mouth of the river Tyne.  They were initially supplied from London by sea, but as the year developed they were increasingly able to rely on local resources, including recruits.  Gateshead had a large Jewish enclave, but also harboured an extreme right wing ‘Gateshead German League’ who quickly allied with the BUF in return for a free hand in dealing with what they perceived as the ‘Jewish problem’.  This alliance had a significant effect on the BUF in the north east.  The link with the authorities in London became weakened, particularly as the fighting across London severely reduced the supply shipments up to the north.  The BUF began to receive ‘lend lease’ supplies from Germany including Wermacht advisors, materiel, and armoured vehicles.  Nazi advisors also provided military and political training to the BUF Legions, forming them in to a highly effective fighting force that rivalled the regular army of Lord Percy’s Tenantry to the north of the Tyne

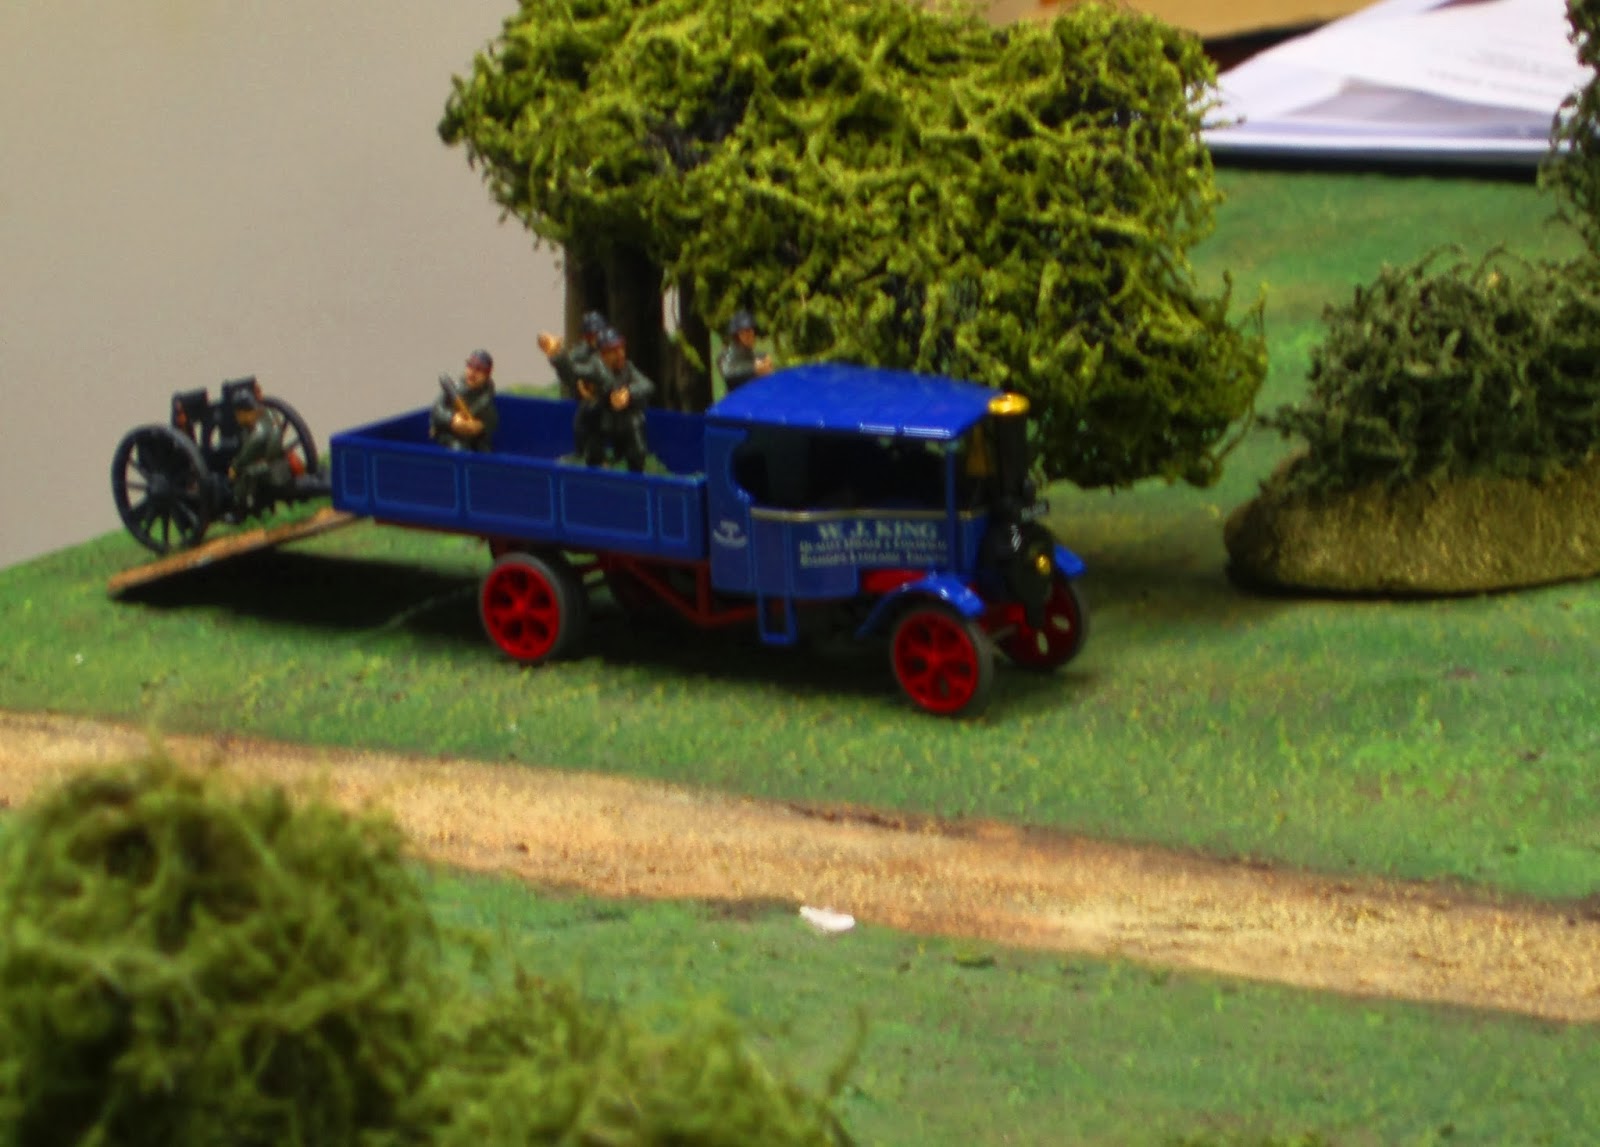
The third protagonist force was the private army of Lord John Lambton, the 5th Earl of Durham.  Lord Lambton suspected that trouble was brewing long before the political troubles and the dissolution of Parliament, and he used a sizeable part of his fortune to purchase a significant stock of French Great War army surplus kit.  His troops were drawn mainly from his estates and took to the field in the French blue with yellow painted helmets of his livery.  These eager amateurs were supplemented with paid mercenaries that provided training and a much needed backbone in the field.  Lambton also maintained a fleet of armour Rolls Royce cars which were his pride and joy throughout the war.  It was said that he would forgive his commanders for losing a battle, but not for losing a Rolls Royce.

By mid-1938, the dominance of the Chopwell Communist forces, in terms of size and supply, forced the BUF and Lord Lambton into an uneasy ‘royalist alliance’.  They were united by their common opposition to the ‘Red menace’, support for the King, and little else.  Despite this, they fought alongside each other in a series of escalating battles throughout the year.  These culminated in the major action at High Hold, and the subsequent engagements during the rout.  After a series of planning meetings, the royalist alliance gathered at Ousten, Urpeth, Pelton, and Pelton Fell with the intention of invading the Communist heartland to break their burgeoning power.  Lord Percy also sent Tenentry support from north of the Tyne, to try and bolster the royalist attack and hopefully end the thorn in his side that was the Communists.  He had far greater troubles dealing with the Northumberland Freedom Fighters, Ashington Socialist rebels and Scottish nationalist border incursions and was happy to supply aid to try and nip the Communist threat in the bud.  The assembled forces moved west into the outer Communist defences at High Hold on the morning of 30th August 1938.  Their initial scouting, especially by motorised BUF patrols, has shown the Red militia in the area to be very poor quality.  The royalist commanders were also astonished at the apparent lack of fortifications or even basic defences in or around High Hold, which in part was the reason for concentrating their attack in that area.

The central defence council in Chopwell were labouring under the assumption that High Hold was a fortified in accordance with their orders and was a well defended outpost beyond their main garrison at Stanley.  They had invested a great deal of resources and placed a series of what they assumed were competent commanders in that area with the expressed purpose of defending it strongly against a much anticipated attack from Gateshead.  Testimonies from after the war suggest that the commanders sent to the area were incompetent and complacent and failed to undertake the work they were assigned to.  Joseph Cardwell, in his excellent book The Chopwell Communists, suggests that the deficiencies were more to do with corruption among the administrative and logistics brigades, and that the resources intended for the fortification of High Hold never arrived.  In any case, High Hold was a poorly fortified position but still well defended with a large force of militia.  To the royalists’ misfortune, the night before the attack, a visiting force of the Socialist Boiler Maker Union Federation of the Working Men were camped in the area.  They had concluded unsuccessful negotiations concerning the possible alliance with Chopwell and were intending to return to Newcastle the following morning.  They would take part in the battle in aid of their Socialist brothers, and later survivors said that this was simply as they had nowhere to go except through the royalist lines.

The Battle of High Hold was the largest engagement of the war so far and was undoubtedly a bloody affair.  Full details of the action can be read elsewhere, but the outcome was a significant victory for the Communists.  The royalist attack was halted at the outskirts of the village, although a concentration of Tenantry armour on the northern flank almost broke through.  The Communist immediately pursued, initially as an ill-disciplined rush and quickly as an organised counter attack and the royalist retreat turned into rout.  Lord Percy’s Tenantry fled north and made it to safety across Wylam Bridge, despite being harassed by Communist local defence units on the way.  The BUF and Lambton’s forces retreated in disarray, many units being pursued to the outskirts of Durham.  This pursuit was halted at the two day battle at The Duke of Wellington public house.  Despite the Communist armour attacking in force, a ragtag collection of royalists commanded by General Morley-Lustworth, who had been badly injured the day before, was able to hold the crossroads and deny the Reds access into Durham.  The Anglican League, ostensibly in control of Durham at this period of the war, offered no help in defending this ground on their border.  Subsequent to the action, Lord Lambton issued various scathing articles and communications concerning the battle.  Privately he was most furious with his own commanders who he felt had wasted the lives of their men defending Anglican territory.

At the end of the fighting the borders were restored, and the positions remained largely unchanged.  Many of the ‘old timers’ who’d fought in the Flanders trenches remarked how the fighting over the year had been just like the Western Front; a lot of men lost for no gain.  The most significant outcome for the battles over the year, and in particular the massive effort from all sides around the High Hold campaign, was to deplete the supplies and reserves of the Communists, the BUF, and Lord Lambton.  Ammunition in particular was now extremely scarce, and it would remain so until well into 1939.


Friday 13 December 2013

Defending the Duke Part 2

The Chopwell Communist attack on the Duke of Wellington public house had been repelled, but the forces under Comrade-Lieutenant Leonard Parkin didn't retreat far.  Overnight the Reds called up replacement militia and what reserves they had left in a final effort to break through to Durham.


The BUF and Lambton forces remained encamped in their positions while General Sir Arthur Morley-Lustworth withdrew north to the Lambton stronghold up near Washington.

At the break of dawn, the Red forces attack again.  This time Parkin's platoon was reorganised and reequipped for assault, and supported by a battery of mortars.  The remaining T26 tanks were organised with militia support.  The plan was simple; break through to capture Potter's bank at all costs.

Parkin's platoon advances across the fields to the south of the Duke of Wellington, ready to advance on Lambton's positions.  Armed for assault, they even have a pack of vicious hounds along for the fun.


Facing them are Lambton's Hounds dug in in their positions from the day before, but this time supported by an armoured car brought up from the rear.  


They also have some fighters pushed forwards to the west of the main road in ambush.  


They open fire on the Reds in the open causing a few casualties, before being cut down to a man by the torrent of Communist return fire. 


Over on the northern flank, the Chopwell armoured force, supported by hastily mustered militia rumble forwards towards the well positioned BUF regulars. 


To their surprise, during the night the BUF brought up some heavy firepower to supplement their field guns, including a Panzer II and and armoured car with an autocannon.  


Before the Reds can advance much beyond their starting positions, two T26s brew up amid viciously effective BUF anti tank fire.


The BUF to the rear give a great cheer as the news of their success spreads fast.  


The remaining Chopwell tanks creep around the copse and manage to destroy the Panzer II, but the militia advance on the northern flank is effectively halted before it begins.


In a brutal exchange of heavy fire, the remaining Red tanks are neutralised and the militia are cut to pieces as they valiantly attempt to push on into the BUF positions.  Disciplined fascist rifle, machinegun and field cannon fire make short work of the advance and the Communist northern flank collapses having barely touched the fascists.   


And so the attention turns to Parkin's action in the south which fares far better.  Well supported by a mortar battery, the Communist irregulars advance to forward covered positions and let their field support do the work.  


Lambton's positions are shattered by mortar bombs and the shell-shocked survivors flee for their lives.

 
The Duke of Wellington is heavily shelled and reduced to a burning wreck.


They do put up a bit of a fight though, and the remaining Lambton artillery give a good account of themselves, but its not enough.


Parkin pushes his platoon north to take the remains of the Duke of Wellington.


The BUF move off of their positions and head south to meet the the advancing Communists.


However, before their forces meet both commanders reevaluate their positions and decide to withdraw before sustaining further loss.  

The battle finished in a a bloody draw, or rather withdrawal.  The door to Durham remains closed, and after two weeks of battles, the High Hold campaign ends with the borders and positions back exactly where they were at the start.  

It was not without consequence though.  Lambton, the BUF and the Communists at Chopwell had each expended massive effort and most of their supplies.  Many men and much materiel had been lost.  Ammunition stores were depleted.  At the end of 1938 it looked like the war would calm down over winter.  Restocking would be vital for all concerned.

An honourable mention goes to Graeme, for stepping in on the war correspondence duties when my camera died early on in the fight.  

And finally, a summary of our war in the north east during 1938.


Saturday 7 December 2013

Defending the Duke Part 1

Following the defeat at High Hold, the Royalist retreat has turned into a rout.  Forward supply bases have been captured by the advancing Chopwell Reds and their pursuit has been reinforced and turned into a concerted push towards the outskirts of Durham.

The situation has become desperate as they advance up the previously impregnable defences up Lowes Barn Bank near Neville’s Cross.  If they can cross the road and capture Potter’s Bank the Communists could well have an open route into Durham itself.

At that crossroads Lord Lambton’s top General (and old friend), Sir Arthur Morley-Lustworth had set up a senior command HQ in the Duke of Wellington public house.  Badly wounded by an artillery shell that burst outside the ‘Wellie’ and destroyed his vehicle (nobody knows who fired the shell), Sir Arthur is unable to move and is trapped with his staff and command intelligence documents.  If these fell into the hands of the Reds it would be a disaster!

The Duke of Wellington is however defended by a ragtag collection of Lambton troops who have hastily rallied around their commander’s position.  Up at Neville’s Cross there’s also a BUF muster point under the command of Captain Harold ‘Blackie’ Blackman that has managed to restore some order, and gather up a decent force of stragglers, including a small contingent of BUF regulars.  Their pickets have reported the advance of Reds towards the Duke of Wellington, and Captain Blackie is keen to ‘get a bit of action’ (having missed out on the High Hold debacle).  He’s also keen to support the BUF’s Lambton ‘ally’.

For the Reds, Comrade-Lieutenant Leonard Parkin is in charge of a strongly reinforced attack group and has been given clear orders to secure the Duke of Wellington pub and open the way down Potter’s Bank.  His scouts report that locals say a Lambton ‘big wig’ is at the public house.  Observation appears to confirm this although the place looks like it’s taken a shelling.  Parkin is highly suspicious of this as he isn’t aware of any Chopwell artillery deployed in his sector.

The battle begins at 10.30am and the stakes couldn't be higher.  Can the Reds ‘kick in the door’ to Durham. Or will the Royalist Alliance stop the Commies at the Duke…?

The battlefield at dawn...


The Duke of Wellington stands in the centre of the crossroads, and just to the east lies the shellhole that injured the General.

Hearing of the approach of the Reds, General Morley-Lustworth orders his men to dig in and barricade in preparation.

Lambton's 'Hounds' are resplendent in their blue and mustard livery. 

Blackie Blackman's BUF arrive from the north and mill about, awaiting the action.


The final preparations are laid, with Lambton's men defending the Duke of Wellington and the territory to the south.  The BUF set up to the north east, down Potter's Bank.  Just in time too and an ominous, squeaking rumble can be heard approaching from the west.

Lambton forces ensconce around the Duke of Wellington and the buildings down Potter's Bank; the BUF hokd positions behing the hedges.

At 10.30am, the Reds arrive.  North of Lowes Barn Bank road, Lieutenant Parkin's platoon advances at the double, careful to avoid the gardens and property of the local civilians.  His Vickers Mk.III and armoured car support trundle up the road itself.  Parkin's men will be taking the hard yards directly up the road to assault the Duke of Wellington.


To the south of the road, deployed for an outflanking move Lieutenant Baywater has a mobile platoon well supported by Cossack cavalry and three freshly acquired T26 tanks.


Ensconced on the upper floor of the pub, General Morley-Lustworth opens the action for the day.  The pub has a working telephone connected to a battery of Lambton artillery to the rear.  The General brings down a heavy shell on the Vickers Mk.III.  It bursts off-target, but damages the tank's tracks slowing it down considerably.    Windows shatter up and down the road and the screams of the cowering civilians can be heard over the shell crack.


'Hawa Merv, tha' wa' clurse.  Had on, a think the drive chain's knacked like'.

To the north, Parkin's men deploy a Vickers gun to cover the platoon advance, while a herd of cows wander by, bemused at all the noise.


Moo.  Moo.  A Communist Vickers team sets up to cover Parkin's advance, watched by a herd of British Whites.

Parkin's right flank is immediately compromised by a group of Lambton irregulars in ambush.  They open fire to telling effect.


Sneaky Lambton militia made up of gamekeepers.  Unconscionable behaviour , hiding in the woods and springing an ambush.  It was painful for the Reds they caught in the open too...


Their rifle fire was amply supported by a sneakily concealed BUF field gun, hidden in the hedgeline to the north east.  It opened on the Chopwell infantry with vicious shrapnel shells and the burst shredded an entire Communist section.
The BUF gun (seen through a fug of local ale).  This field piece caused untold damage to Lt Parkin's advance and laid many Reds low with some highly disciplined and effective rapid fire with shrapnel shells.


The BUF infantry immediately advanced with a cheer!  The stunned and panicked Reds were in disarray and Blackie Blackman ordered his men to take advantage and get up to the ridge to take advantage and 'give those Pinkos Hell'.  


Some BUF, taking the whole war far too seriously.  Apparently, the chaps up in Gateshead have been buying in German kit from that nice Mr Hitler.
 To the south, Baywater's advance was less bloody, but frustratingly slow.  The armour struggled to cross the hedgeline, with one T26 becoming stranded as it crossed.  The Cossacks milled about, unwilling to advance until the tanks had cleared the way.

The Reds impetus stalls at the hedgeline.

Some progress was made however, and the tanks set up a firing line and attempted to dig out the well defended Lambton troops.


General Morley-Lustworth, once again made use of his available artillery and skillfully screened off his positions with smoke rounds.


The Wellie appears unassailable given its excellent defence.
 

He also brought down more heavy shellfire in an attempt to destroy Parkin's advancing armour; again without managing to destroy the fighting vehicles.
'Mind yer 'ead Bert.'

 As the BUF pushed in, Parkin's platoon diverted their advance through the alleyways and onto Lowes Barn Bank road itself.  They took heavy casualties from the BUF Lewis gun and rifles, but managed to get through in sufficient numbers for their main task (capturing the pub; all this fighting is thirsty work after all).


Sensing the Red attack was coming in, Morley-Lustworth brings down a mass of smoke to cut off the armoured fire base and orders the advance of his prized Rolls Royce armoured car to cover the road.


It doesn't quite work as planned and as the wind takes the smoke to the south west, the Vickers main gun opens up and gives the Rolls Royce six of the best, trousers down style.  The car brews up in an almighty explosion!  Lord Lambton will not be happy; his fleet of Rollers is his pride and joy.


You were only supposed to blow the bloody doors off.

To the south Baywater's platoon is stymied, but finally a group of Cossacks are shamed into getting forwards into the action. They are predictably gunned gown to a man.  Well done chaps!


'Tally ho chaps!'

The BUF press hard south in an attempt hit the flank of Parkin's attack.  They also redeploy their field gun to resist the Chopwell armour.


Parkin orders his armour to block the alleyways and hold off the BUF, which they duly do.


Giving Parkin's men time to kick in the back door of the Duke of Wellington and try to take the building.  General Morley-Lustworth's guards fight back valiantly though and the Reds are forced to retreat in disarray.
'Bar's open lads'.
Your name's not down, you're not coming in.

With many good Chopwell men dead on the field, and the Royalist BUF, and Lambton's men battered but still in a strong position, Parkin orders a general retreat and the battle ends as quickly as it began.

General Morley-Lustworth telephones Lord Lambton to inform him that all is well at the Duke of Wellington and he'll be back at the manor house as soon as he can rustle up a car.

Meanwhile...

'Hawa man Sid, d'ya fancy a geet bit 'o beef f'ye bait the neet?'


So, it was a hard fought battle in which the Chopwell Communists failed to coordinate a decent attack on the Royalist positions.  They did manage to get a belated assault in on the pub but by then, the BUF had successfully folded the northern flank, and Lambton's men had made an excellent defence of the main positions.  In particular the use of artillery was well done and really helped the victory.  Lt Baywater's platoon refusing to advance for most of the battle also helped!

The battle was fought using our conversion of the Dux Bellorum rules and once again they worked very well, giving a simple, exciting game.  We felt the suppression rules needed a tweak but other than that, no worries!

Oh, and the battlefield today?


As seen from the north and the BUF positions