After a peaceful winter, 1939 was quiet in the northeast, at least until a major clash at the Battle of Neville’s Cross on the 23rd of May. For most, the winter had reminded them of what peace was like and they simply gave up on the war, returning to their jobs and looking after their families. But this respite was all too brief, and the guns once again crackled around Durham.
The winter had changed a fair bit for the combatants too. The BUF were now occupied with keeping a lid on civil unrest in Newcastle City, with lots of troublemaking pockets claiming they are part of ‘St James’ army’, a notional city resistance movement. Their attempts to gain political control of Newcastle Council failed as the coal barons closed ranks to maintain their commercial control of key regional assets. Lord Percy north of the Tyne was increasingly drawn into the conflict with Ashington. The Northumberland Freedom Fighters were also causing terrible problems with hit and run raids on government presence in their goal of Northumberland secession. The presence of increasing numbers of Scottish Nationalists in the region also focussed Lord Percy’s attentions to the north. The Anglican League cemented their control of Durham city with strong physical fortifications, social policies, and support for the poor (including subsidised pub prices) making them highly popular. The Right Reverend Hensley Henson, Bishop of Durham had declared his fierce opposition to the Chopwell Communists, Socialist and Union-backed rebels from the start of the war, and his position only hardened as the conflict progressed. Despite this, the militia he raised had yet to take to the field, preferring to hold their ground in defence. At Chopwell, rumours spread that all was not well in the leadership. The firebrand John Harding had spent a lot of goodwill with promises of easy victory which turned out not to be true and the moderates in the Duma were openly calling for a different approach. For them, Chopwell had gained much, and they preferred to consolidate their gains and move to a political solution to the war.
This handed the initiative to the Establishment Alliance, led by Lord Lambton, who buoyed by his troops’ performance at the Battle at Nevilles Cross decided to strike into the territory claimed by Chopwell. Supported by the Gateshead 'Germans' (with surprisingly Gateshead accents), on 1st June 1939 they mustered at Blaydon and headed southwest on the 20-minute march along Barlow Road. Although they’d intended to head out in the morning, some issues with a motor truck breaking down meant the Gateshead lads didn’t arrive at Blaydon until just after 1pm, delaying the start to the afternoon. Lambton’s aims were to test the Chopwell outer defences, which the Loyalists met dug in at the village of Barlow. A mixed garrison of Chopwell militia and allied Socialist regulars were wiling away their time and were surprised by the approach of the Loyalists.
The Battle of Barlow began 1st June 1939 and continued the 2nd.
1st June 1939
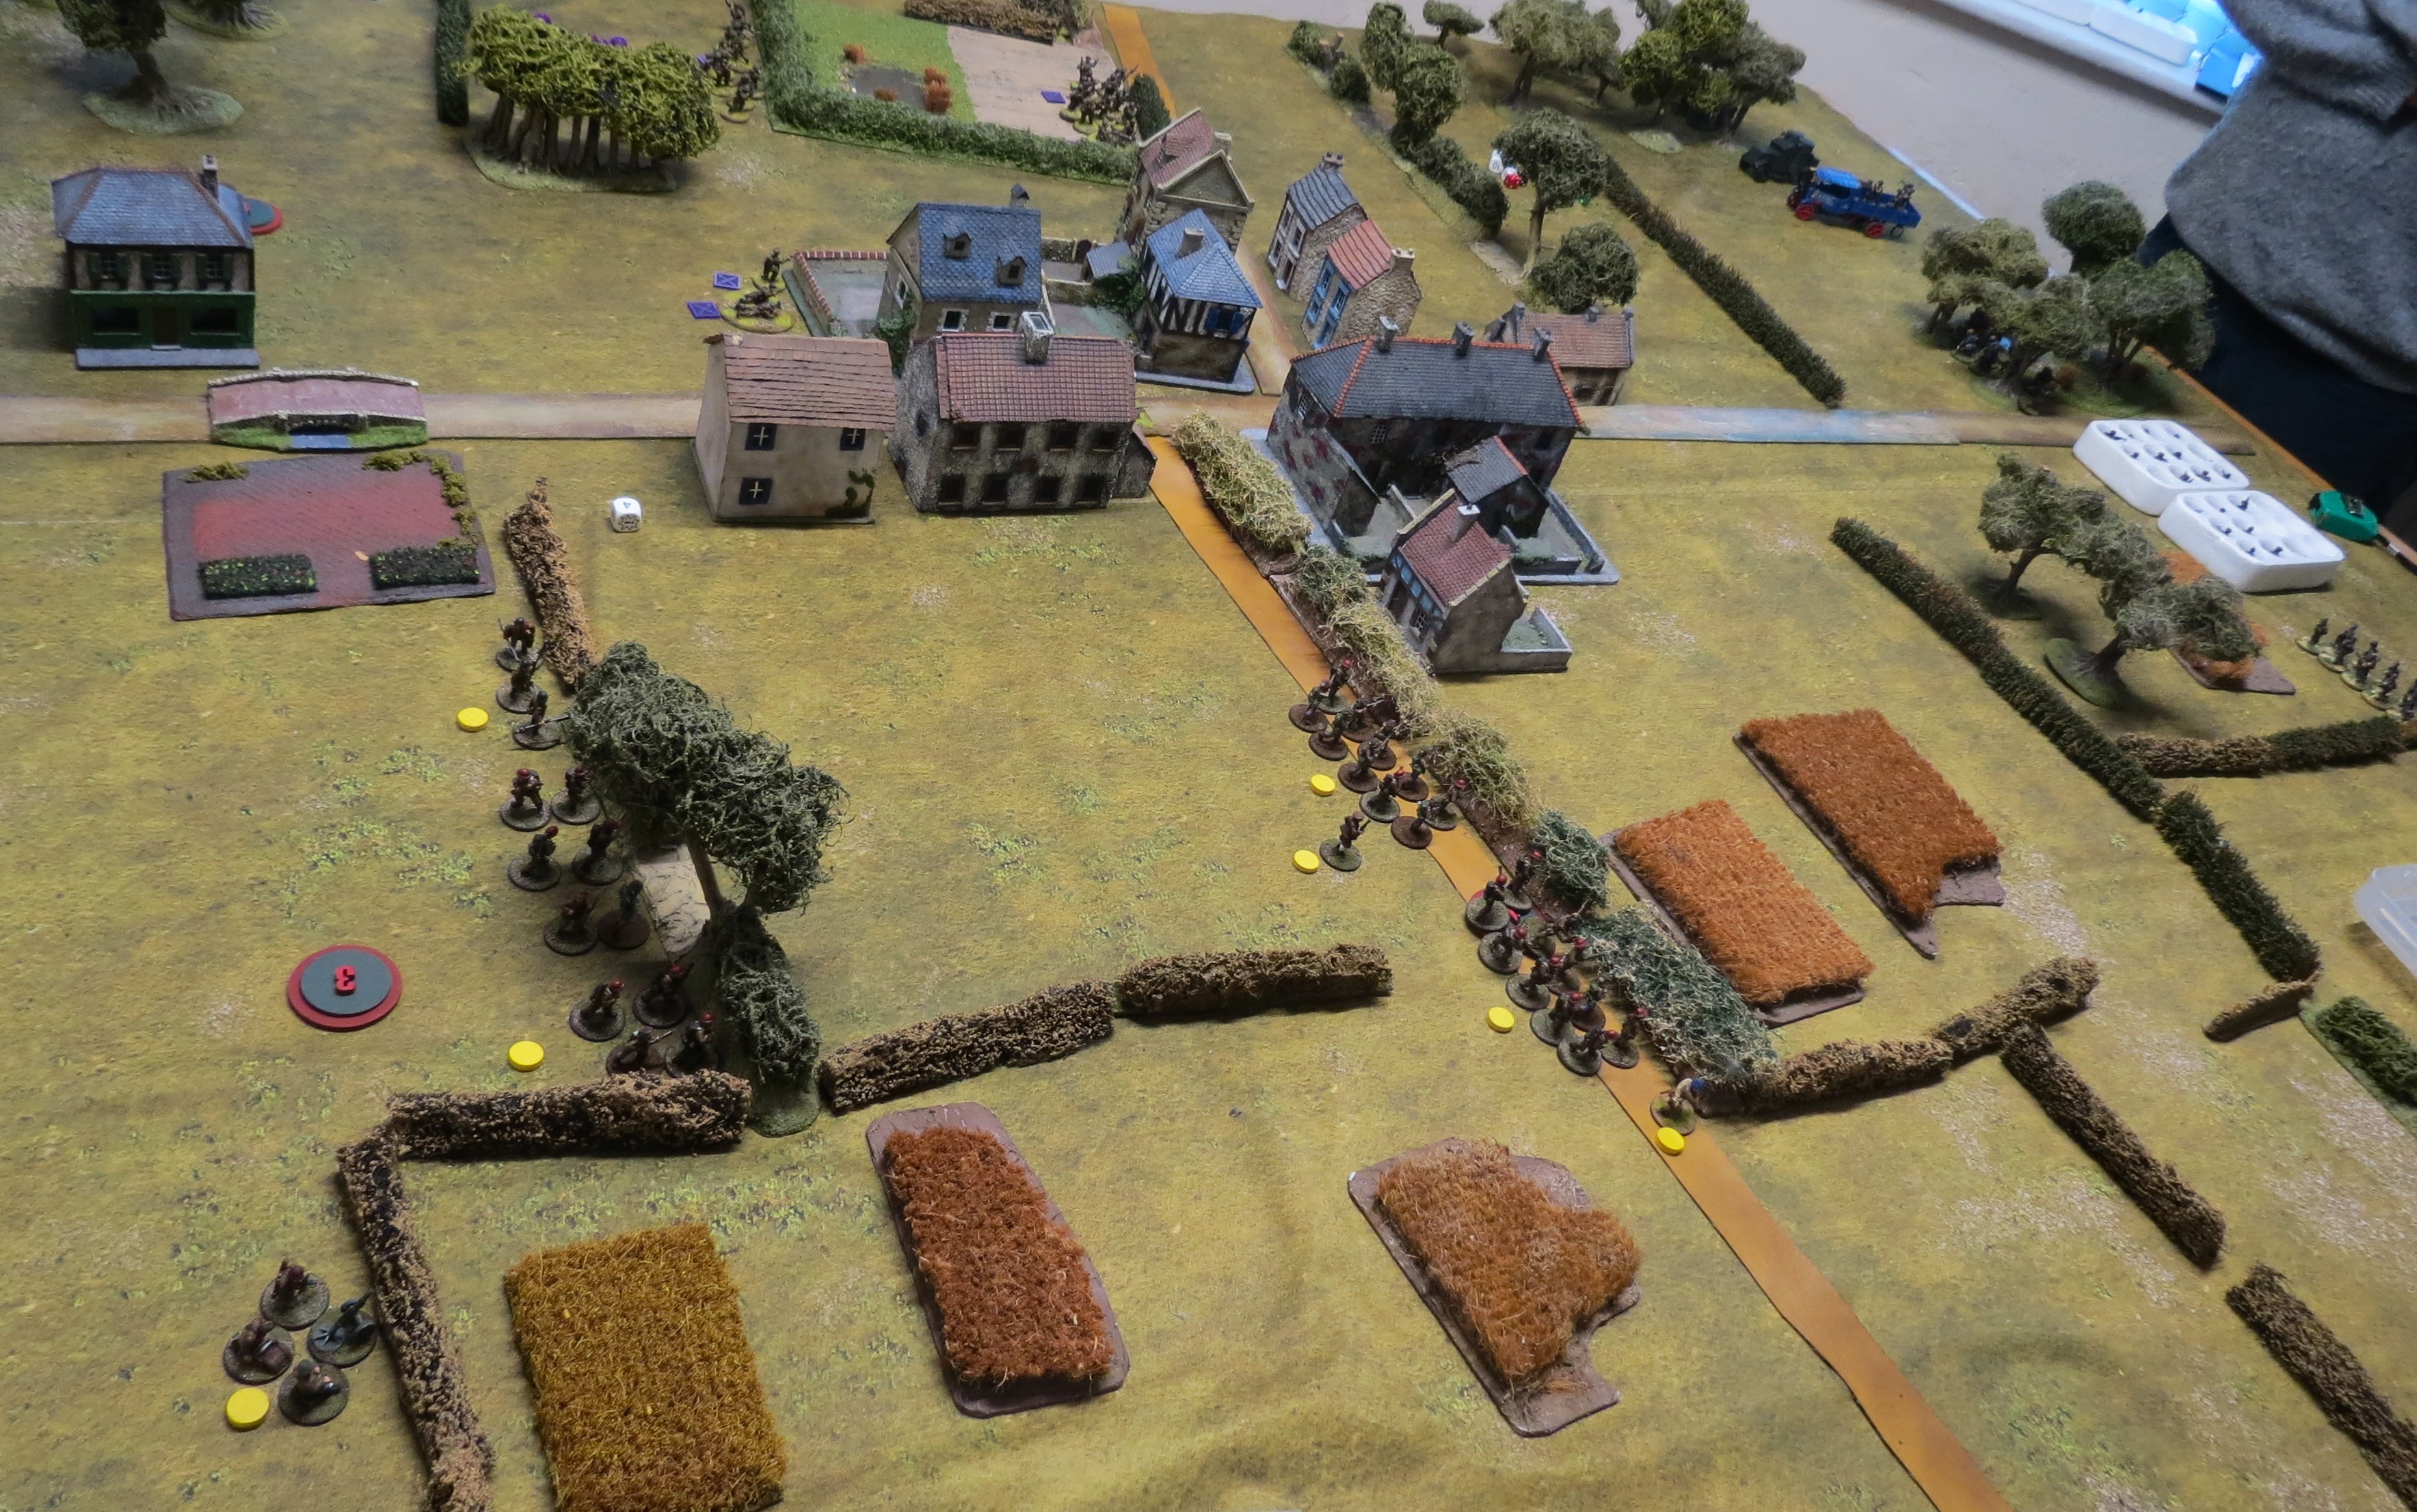
Hearing the advance of Lambton and his allies, the Red militia occupied their dug in positions to the north and south of Barlow village.
 |
| His Nibbs overseeing the militia and dug in sniper. |
 |
| Lambton's Hounds advance through the woods, with the musketeers in a truck supported by an armoured car. |
 |
| Gateshead regulars well commanded and supported by a medic line up flanked by skittish lancers. |
 |
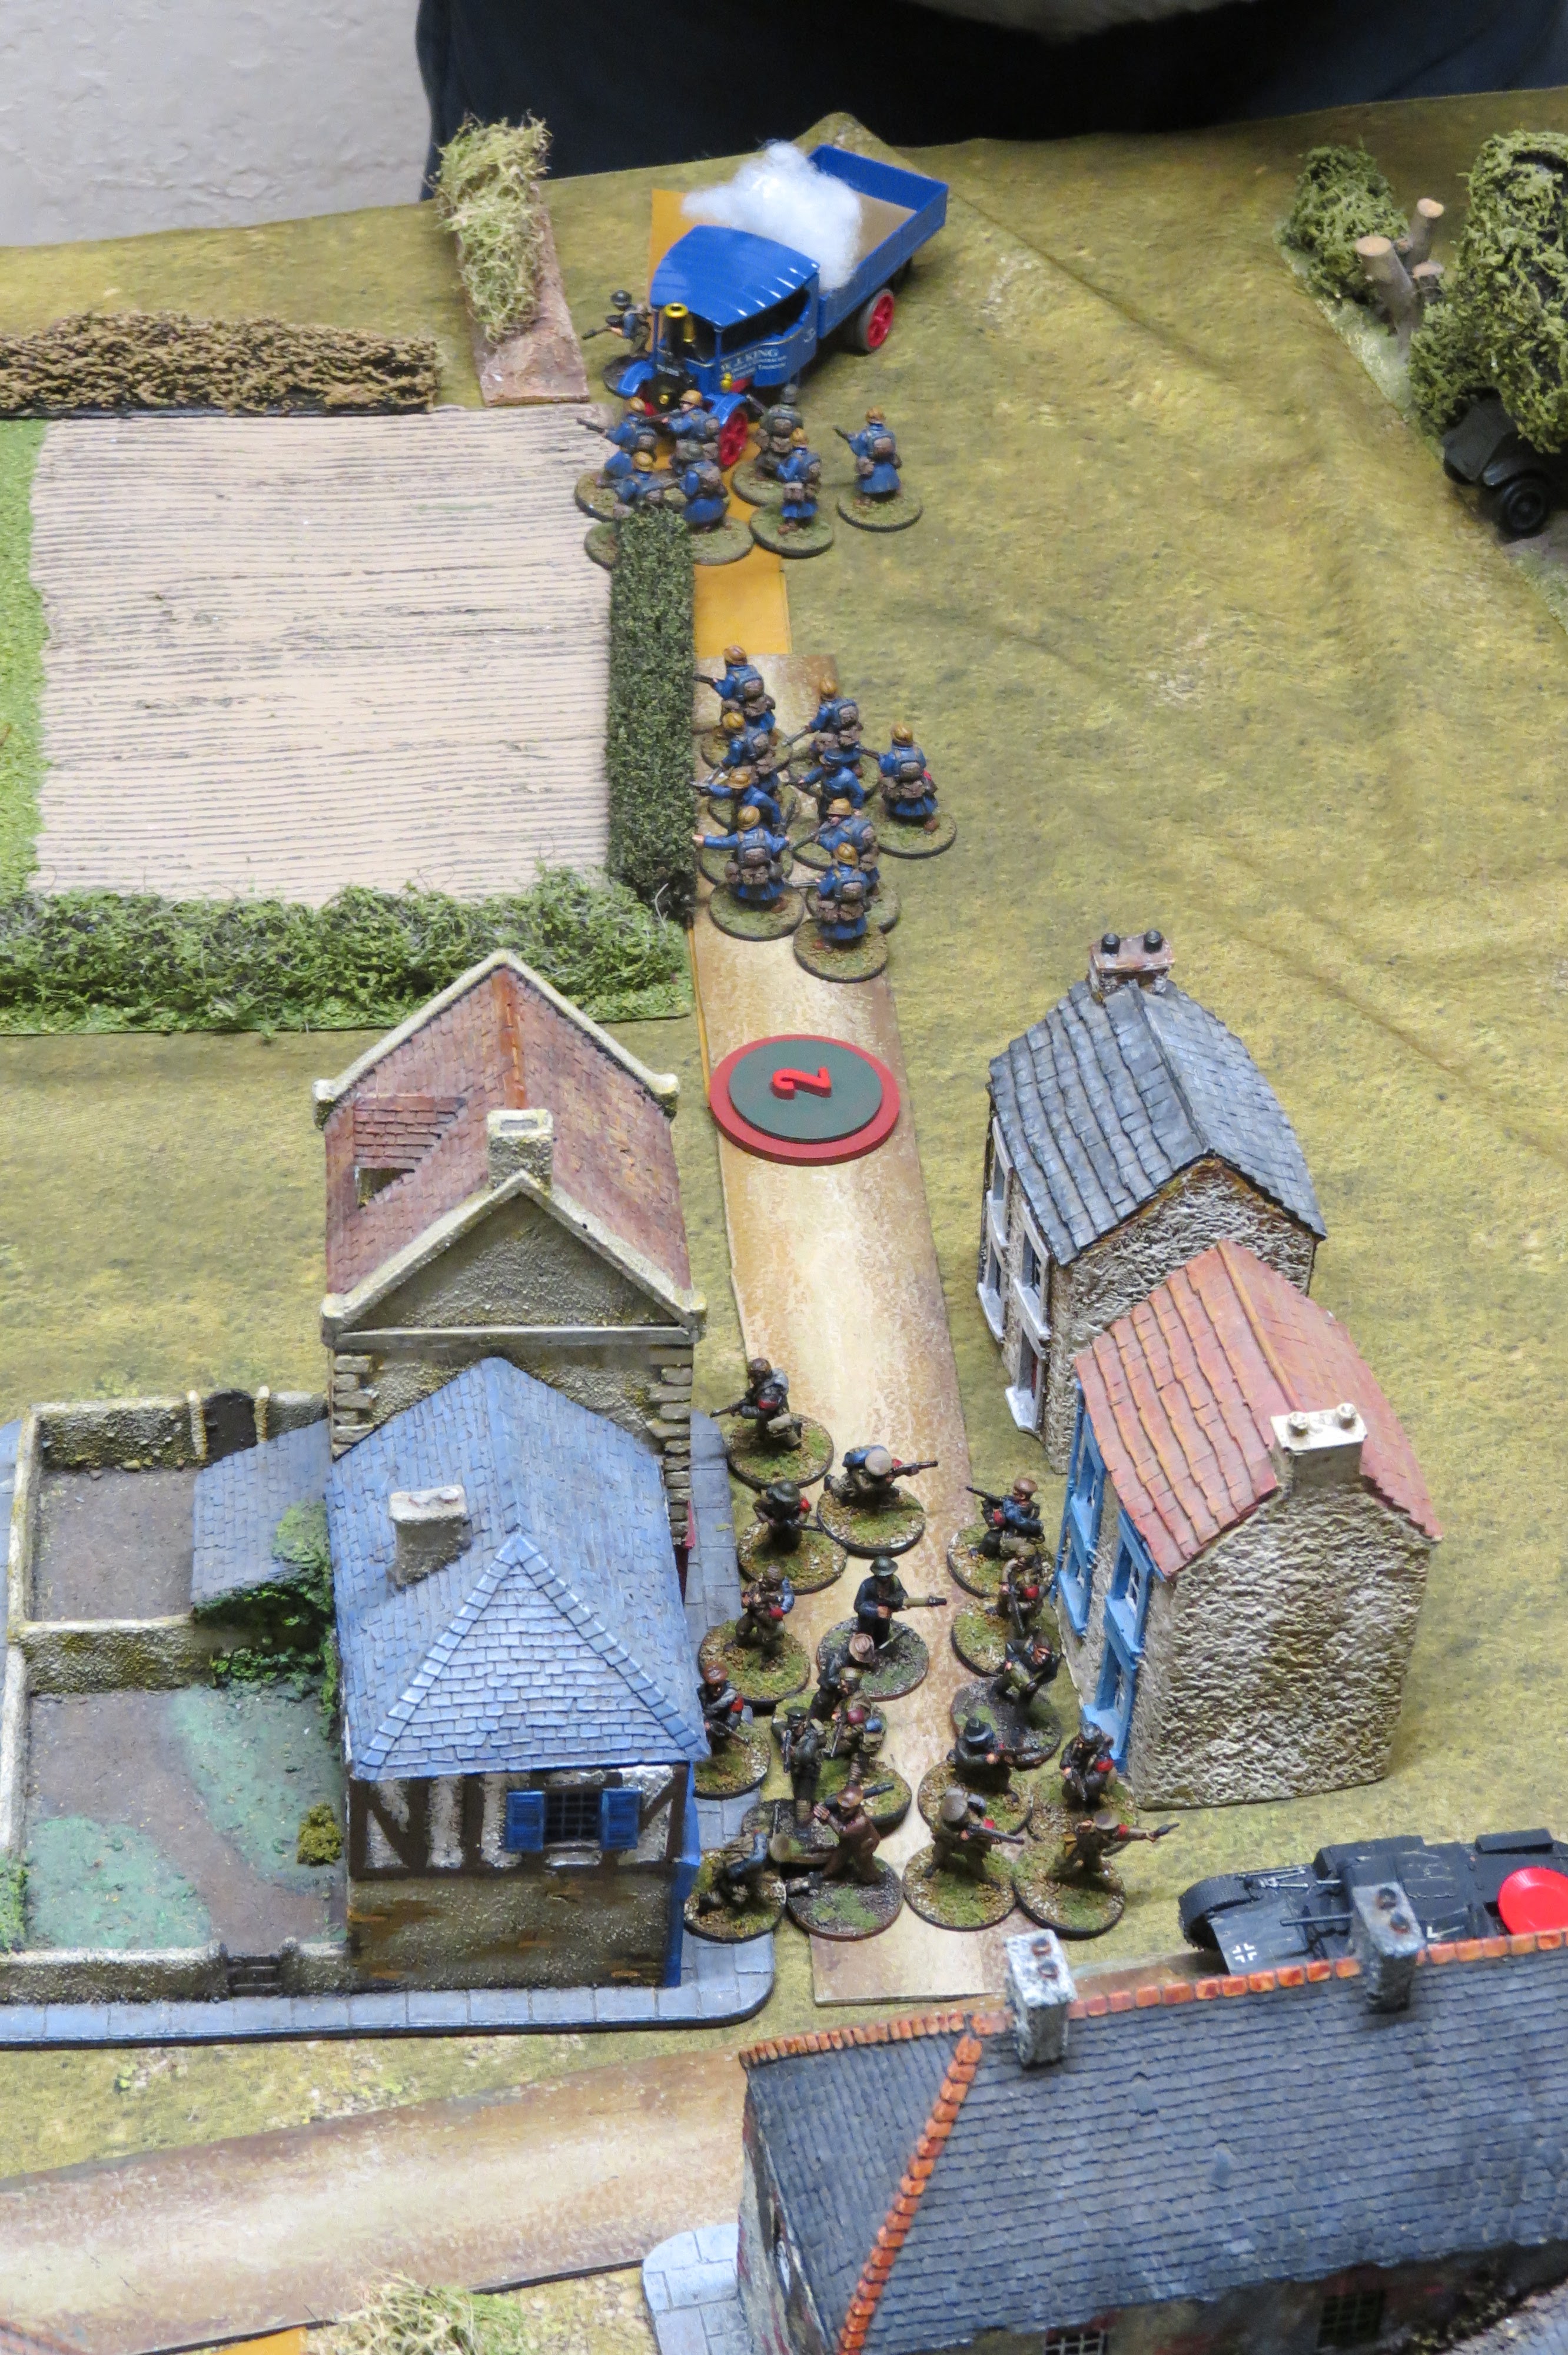
| On Barlow Road the Gateshead motorpool, imported from Germany over winter rumble forwards. |


 |
| The action begins with a swift rush by the attacking armour. |
Game Comment: the allied attackers lined up and made a general advance across the whole front. The suffered initial reverses with the defenders concentrating fire on the advancing armoured car. Both were promptly destroyed! But it did mean that the following infantry were able to advance largely unmolested.
 |
| The sneaky Reds has an anti-tank gun entrenched in Barlow itself and with the opening shot brewed up the German Rolls Royce! |
 |
| Meanwhile the supporting infantry pushed up, peppering the dug in Reds with walking fire. |

 |
| To the north of Barlow, Sustained Chopwell fire shattered Lord Lambton's Austin AC, drawing the Gateshead PzII across the suppress the Socialist positions. |
Game Comment: the attackers concentrated their attack in an aggressive move north of Barlow village, and facing a storm of fire, the Red defences here crumbled quickly. By turn 3 of 8, it was clear the attackers were going to break through here and they captured the objective on Barlow Lane with minimal infantry losses. Lambton's Hounds were regulars and therefore better quality than the Red militia, and were supported by a large mob of their own militia, putting out a lot of low quality shooting.
 |
| To the south, the Gatehead cavalry galloped forwards looking to prick out the Chopwell defenders at the point of a lance. Ulitmately, they would be blown to spots by the Reds supporting mortar fire. |
 |
| As Lambton's Hounds struggled forwards with bounding fire, the Gatehead regulars set up a devastating firing line that tore through the dug in militia before them with disciplined volleys. |
Game Comment: The southern flank looked more secure for the Reds as the Gateshead German League regulars, ably supported by a medic and a leader with 'take aim' preferred to set up a firing line. They did push their lancer cavalry forwards, who killed the Reds sniper before being shredded with mortar fire.


Game Comment: Its about this time after an hour or so of in-game fighting that ammunition was running seriously low for both sides, and the vehicles began to sputter as their fuel tanks drained to fumes. We'd created house rules for this:
Low ammo - In a shooting attack, each '1' removes a successful hit.
Low fuel - after a vehicle moves roll 1d6. On a '1' the vehicle runs out of fuel and can only take hold actions from then on.

 |
| The Reds north of Barlow were shot to bits and Lambton's Hounds advanced to seize their first objective, Barlow Lane. The mad Gateshead motorcycle charged across open ground to try to seize the read objective. The Red commander leapt out and killed them with a sword as they passed! |
 |
| In the south, the positions along Barlow Lane south were overrun by Gateshead armour, capturing their second objective. |
Game Comment: south of Barlow, with the Red militia front line shot to pieces, the Gateshead armour lead the charge supported by its infantry taking the objective here. The Red reserves moved forwards to try to shore up the forward position but were cut to ribbons in the open, securing the game for the allied attackers!
 |
| North Barlow Lane is captured by the jubilant Lambton's Hounds! |
 |
| The Reds are spent, and the Gateshead lads still have reserves on the way. |
Lambton's orders meant that the allied forces didn't pursue and instead hunkered down to consolidate their positions at Barlow. The surviving vehicles withdrew for maintenance and refuelling, and much of their force also withdrew to shore up their line of advance.
As night fell, the scene was set for the second day of the battle, as the Reds planned a fierce counterattack to retake their outer defences.

_____________________
SCENARIO RULES
Day
1 (1st June) – First Contact
Game
length: 8 turns Table set-up: see
plan
Objective Markers
Halfway along Barlow Lane (north)
Halfway along Barlow Lane (south)
18” in from Pawston Road edge and touching north Woods
18” in from Pawston Road edge and 12” south of road
Victory points (scored at the end of turn 8)
Reds score 2VPs each for Objectives 1 and 2, and 1VP each
for Objectives 3 and 4.
Loyalists score 2VPs each for Objectives 3 and 4, and 1VP each
for Objectives 1 and 2.
Loyalist Forces
Each Loyalist player has
1500pts to construct their force.
The force may include
infantry, civilian vehicles, and armoured vehicles.
Red Forces
Each Red player has 1000pts
to construct their force.
The force may include
infantry and civilian vehicles, but not armoured vehicles.
Prepared positions: Any Red infantry may begin the game “dug in”. They
count as in cover until they move.
Prepared ground: At the start of turn turn (during ambush), the Reds
may reveal a ‘minefield’. Place a token and roll 1d6+6”. For Turn 2, all
Loyalist forces that move within that distance of the marker must make a
dangerous terrain test.
Deployment
Reds: Deploy first.
Their baseline is the Pawston Road table edge. They may deploy anywhere
up to Barlow Lane. They may ambush but cannot scout.
Loyalists: Deploy second. Their baseline if the Barlow Road
table edge. They may deploy anywhere up
to 12” in from the Barlow Road table edge. They may scout but cannot ambush.
No comments:
Post a Comment