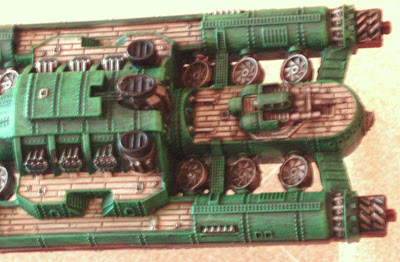
As my fleet expands I've looked more at the aerial units to add some options. Next on the list is the Tsukuyomi Class War Gyro, which is essentially a flying battleship.
So, I cleaned it up and under-coated it, but when I came to paint the model I noticed that between the gyros there was a flat layer of resin that didn't look right. Was this a part of the model or flash to be removed?
It was very robust and so didn't feel like flash. Rather confused I asked for advice from the Spartan online community, and learned that it seems to be part of the model that most people 'put up with', but some file out. It took me a while to think about but ultimately I felt the online examples where this resin infill had been removed looked better so i resolved to remove it.
With a pin vice (mini drill) it drilled out much of the resin.
Having drilled much of it out i then used an old slender bladed craft knife to chop out as much of the resin as possible. This was surprisingly tricky as the resin was actually quite thick and unwilling to be chopped out. I was very conscious that the actual gyros looked quite fragile and so I was careful not to cut into or put pressure on them.
It all looked pretty rough at this stage and I started to think i should just have left it all be, but no matter. These things always look dodgy half way through. Anyway, having chopped much of it out, I moved on to filing things off to tidy it all up. The resin was actually very easy to file, and was almost too soft and friable, so I was very careful not to file too deeply for fear of damaging the detail. I used a round file and a narrow flat file.
The whole process actually took about an hour which in terms of model preparation time would normally have me raging. Poor casting and flash is a bugbear of mine and I hate dealing with it. It always smacks to me of the figures suppliers not bothering to take pride in their products. In this case though this was initiated by me so no worries.
OK, so, the resin filed out I'll move on to the painting. As with all the Dystopian Wars ships I start with the decks as they are the 'deepest' part of each model. I use Games Workshop paints so will reference their colours. Firstly a couple of washes of Desert Yellow mixed with a small bit of Bleached Bone gives the deck layer colour. Of course, GW recently renamed all their paints for some bizarre reason, so I've no idea what they might be called now.
As you can see, its pretty roughly slapped on. With each layer colour I get more precise as it covers over the previous colour. This is why I tend to work 'deepest out' and lightest to darkest, so that the colour changes become more crisp as I go.
Next I layered the underside with Adeptus Battlegrey, poking the colour through and up the sides as it'll be covered over and edge-defined by the next layer, which is Dark Angels Green.
So that's the three base colours on, which took me about 10 minutes to slap on. There were some fiddly bits on the upper structure that meant I needed to be a bit careful when putting the green on. I did get a bit of bleeding onto the main centre decks, but no worries. It wasn't too bad and the final wash would cover it over.
Next I moved on to the drybrushing stage, starting with the grey underside. I used Fortress Grey and gave it a good going over with with a moderate drybrush, starting carefully and gradually building up the highlighting in prominent areas.
Drybrushing often brings out hidden detail and in this case, the surface of the fuselage / hull (?) appears to be ridged as if it were canvass or aluminium stretched over a steel frame. Very nice! These Spartan Models really are exceptional quality!
Next up I drybrushed the upper hull with Snot green (oh dear) and then a final edge highlight drybrush with Goblin Green.
Following that...well...um...I forgot to take 'action' photos, but following that I sorted out the metal bits and bobs. The gyros, the various weapons, and the engines, propellers and funnels were all carefully layered with Boltgun Metal.
I glued on the turrets and painted them up quickly too.
Then I added the red details using Scab Red as the layer and an overbrush of Blood Red to highlight the pointy pits.
The final part was to use the excellent GW Devlan Mud ink wash applied liberally to the decks, all over the metal parts and anywhere I wanted to add a bit of 'ageing', dirt, or otherwise to cover up a ragged edge or bit of mis-painting! The liberally use of a final wash like this also ties a figure together in terms of 'colour tone' too.
Anyway, here's the final model.
I'm very pleased that I chose to drill out the resin as, although it was a pain to do I think the model looks better for it. Overall I'm happy with the result.
Now to see if this ship is any good in battle!


Very nice :D
ReplyDeleteIm considering drilling it out as well, but ive got 2 models arriving in the mail, and I dont know if I want to spend so much time on filing and drilling.... :)
I shared your reticence, but it's well worth taking the time I think.
ReplyDelete