Saturday, 9 November 2019

Gaslands: Performance is everything

With my next Gaslands car conversion I thought I'd do a short "how to" painting guide.  Some of my gaming friends asked me how I painted my cars so I thought I'd oblige!

So without further ado, here we go.

I'd bought a couple of new cars while out shopping last night, so I chose one of these for this "how to".


And of the teo, this "performance car" was calling to me the loudest!


In my view the key to converting these little cars is threefold:

1. Try to keep the modifications in scale with the donor vehicle;
2. Try to maintain the "profile" of the vehicle's shape as much as possible; and
3. Less is more (don't overdo it).

With this in mind I wanted to keep this vehicle as a sleek looking fast-mover.  I raided my bits box and found a couple suitable pieces, mostly from Games Workshop's space marine range.  I figured plasma pistols would need to be drastically cut down, but they'd serve well as high-tech weapons like combat lasers, or otherwise as cool looking sci fi machineguns.


A couple of minutes later, after some snipping, filing and superglue, I'd attached these pieces to the car.  In line with my idea of not disrupting the profile, and keeping the car "balanced", it seemed to me that most of these additions would be best applied to the rear part of the car, as the massive engine block provided anough "weught" at the front.  I used the toothpick "spikes" projecting from the front to accuntuate the sleek length of the vehicle.


I put the small lamp thing over the model's petrol cap.  I've no idea what it will represent, but it might be something to do with the laser weapons?  I used a rifle scope as an electronic viewfinder / camera for the driver is I intend to paint over the glass and make it a fully enclosed armoured canopy.


To give the option of rear dropper weapons, I used the grenades simply glued to the rear.

Once this was done, i sprayed the whole thing brown.  I use Halfords brand camouflage paint for most of my undercoat work, and generally prefer brown as I find it less harsh than black or white.  In this case its also very useful as it provides a solid base for the rust effect I'm going to apply.


I use two colours to create my rust effect.  As I use Games Workshop paints, these colours are Mournefang Brown and Deathclaw Brown.  If you use other colourse, a red-brown and an orange-brown will do.


My technique is fairly simple, easy and quick to do.  I use a cheap toothbrush, get a bit of paint on it, and run my thumb across to "speckle" the paint on first.  I then "splotch" or stipple on larger patches of paint.  I use the red brown first, and then the orange brown.


This will achieve the following effect.


Next stage is to take a dark silver or "gunmetal" paint, and give a heavy drybrush over the rusty parts.  This mutes and blends the speckled paint together, and brings it to a point where it looks like old metal.


For a post apocalyptic vehicle, I could probably stop there, add a bit of detailing and call this done!  But I wanted to give this car a nice bit of colour, so onto the next stage.  I'm not a fan of blue, but this one seemed to need to be blue so i chose a colour that my wife assures me is "teal".  Games Workshop calls it Sotek Green.  I considered that the paint would be shredded off by the extreme speed this vehicle would obviously be capable of.  So I applied the colour using a a bit of very heavy drybrushing, mixed with a bit of overbrushing.  I began at the back of the model, and tried to only really paint on the rear surfaces, leaving the leading edge surfaces and recesses more rusty.


That done, I move onto the ink washing.  On this one I used mainly a brown and in this case Games Workshop's Agrax Earthshade.  I applied this colour over the engine (mainly the deeper areas and recesses), along the bottom sills, and in the deeper recesses of the bodywork, to give some definition.  I also "heat-stained" the muzzles of the combat lasers.


Ink washing is also useful for "splotching on" to areas where there might be oil spills or similar stains.


And finally, the detailing.  I applied some decals (always a pain to do, and I find I need to use PVA in the water mix to get the damned things to stick down) and muddied them over with ink wash.  I painted in the headlights, and the camera lense.  Finally I gave it a go with a silver paint to chip the edges and run a few serious scratches across the surfaces and called it "job done".  

Simple, easy, and start to finish about 90 minutes (not including the drying time for the undercoat).


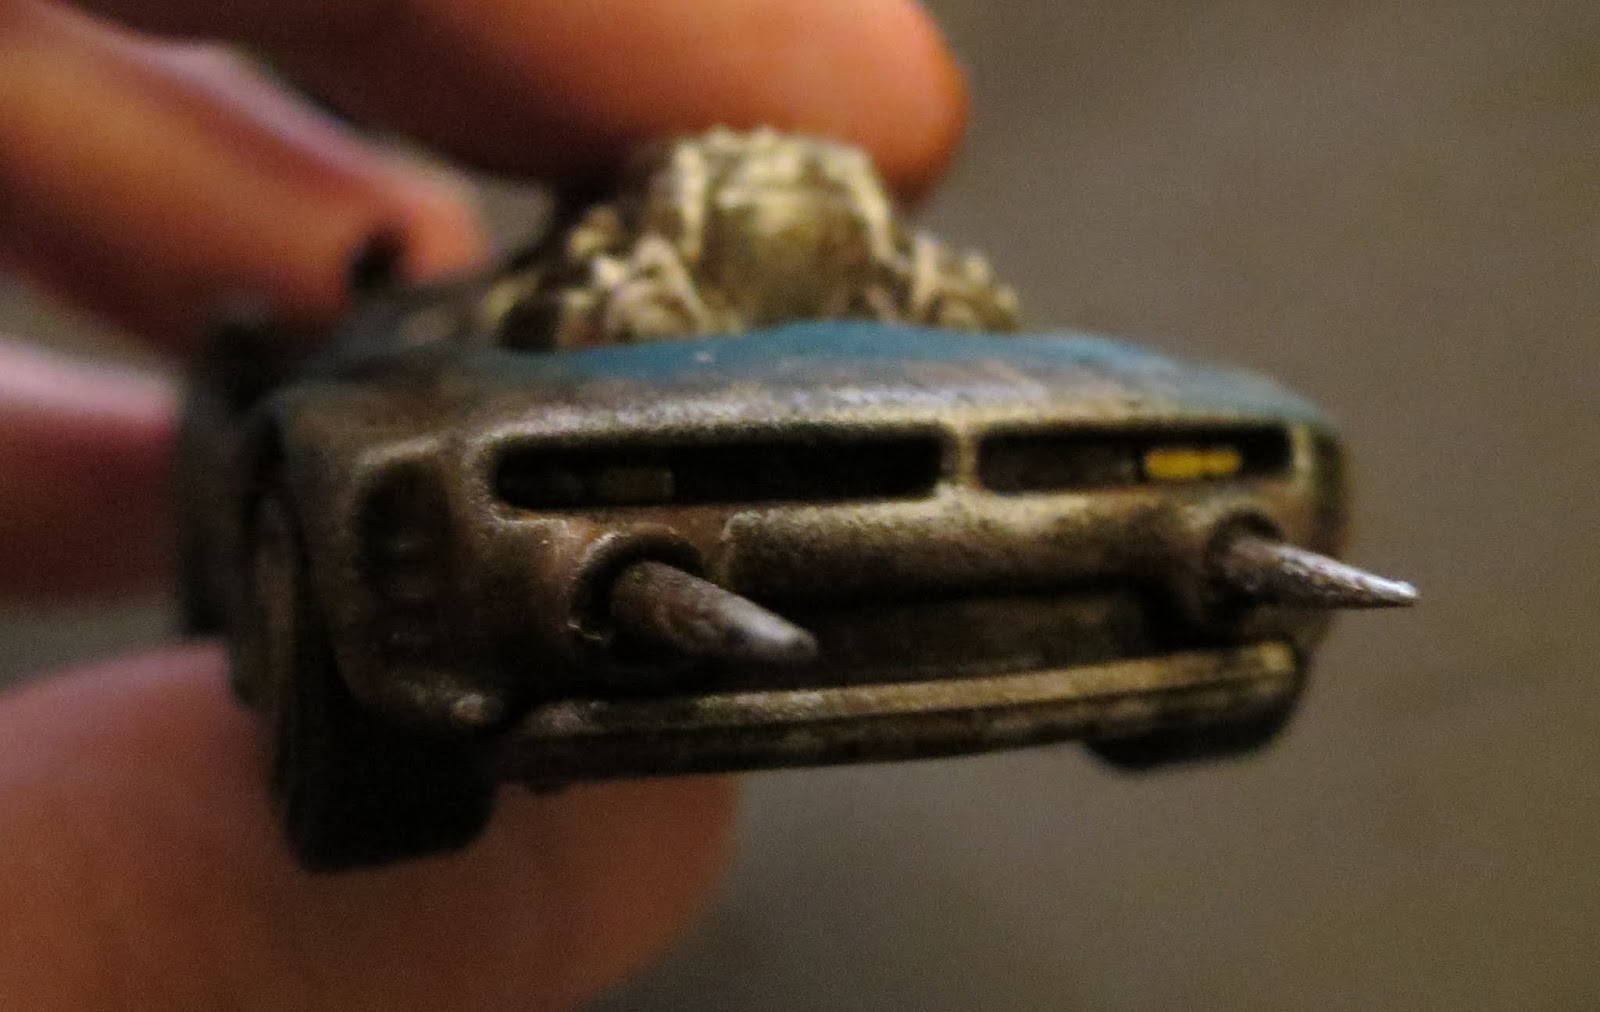


So, here we have Winston "Wolf" Harland, a speed freak originally from London, but drafted by contract up into the Norcumbrian Arena bush-league.  He's quickly become a Blaydon Arean fan-favourite with his high-octane brand of "speed at all costs", and his spectacular multi-chromatic combat laser rig.
Wolf rides a Masseratt Lam del Vento 20, with the F247 duplex V16 engine developing 1238hp.  Wolf has wrapped the cockpit in Cerakev armourflex, and runs a Sanya A2 sensor suite.  His main weapon is the fearsome Arasaka 90W combat laser array, with multichromatic filters to provide a technicolour display of death.  Depending on the Arena game, he maintains a rear dropper rig as well, to cause trouble for anyone trying to line him up as he disappears into the distance.

"Wagwan cuz, check out me whip innit.  Trus' me fam, yu don wanna get murky on the track w'me..." - Winston "Wolf" Harland


Gaslands: Fire it up!

I'm steadily building up the stock of converted cars I have for Gaslands and we learn the rules, play faltering early games and make our terrain, etc.

My next conversion project was to a certain extent chosen for me.  In a social media group "Gaslands UK" they're running at competion for November, as follows:


Car of the Month November - Cult of Flame

Entry Rules Pack

Welcome gaslanders to Gaslands UK Car of the Month !!

It’s really simple to enter and the reward is a surprise prize pack provided by the Sponsor of the Month.

To enter Car of the Month simple;
- Join that months event so we know you are entering. Entry starts from the 1st of the month, however you can join during the competition.
- Take a before photo of the vehicle with either a date stamp or relevant dated product next to the vehicle. E.g. a newspaper with the date on it.
- Post a completed model by midnight on the 25th.

This will prove the vehicle is started and finished that month. All entrants must be UK residents.

For November Car of the Month, will ask you to make a vehicle from a Cult of Flame you know bonfires and all....

This can be any design oriented toward this Sponsor.

The monthly Sponsor will then judge all the entered Car of the Month vehicles from the 26th, to announce the Winner on the 30th of each month.

The Winning car will be chosen on:
- Modifications
- Paint job
- Theme

EDIT: Turns out I won the competition!

So, I figured, why not bash something together and enter!?

I'd bought a small stock of cars which are awaiting conversion, and rummaging through I found I had this thing.


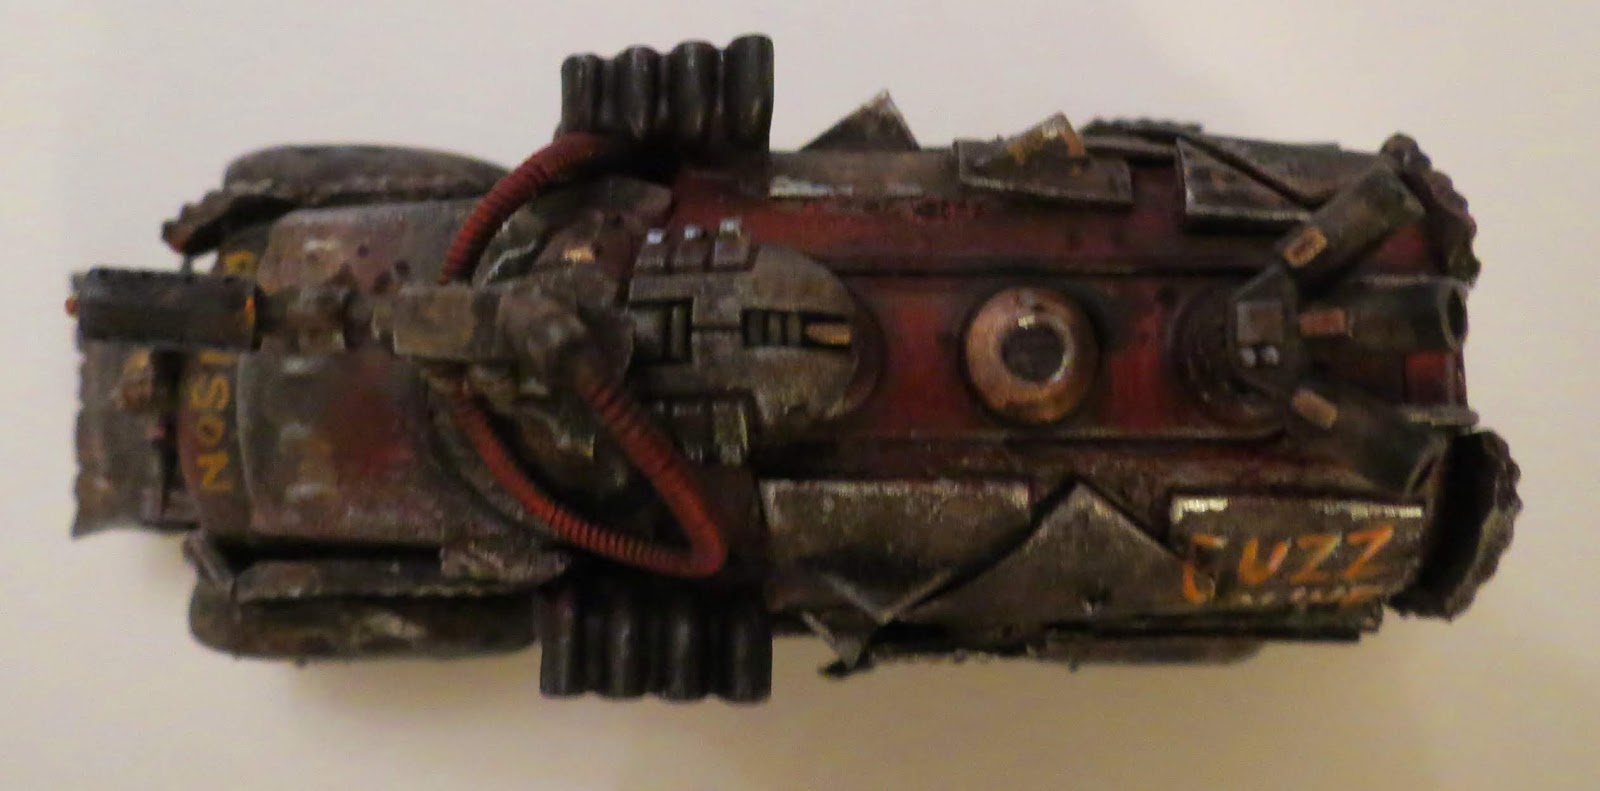
It seemed most appropriate so I entered and set to work.  A couple of hours later and behold!  Ronson is born!


I gave this a little backstory too.

In the Blaydon Arena of the Northern British Norcumbrian Marches, there's a new entrant to the Gaslands bush leagues. Ron "Lighter" Ronson, in his uparmoured truck "Guzzoline". This is a Morrison Model 451F bowser truck, more commonly seen transporting potable water to the outer settlements from Drum City or the New-Gate Metropol. Its also popular with fuel transportation companies. Ronson bought the truck and converted it for the Arena.


Gaslands: Shiny and Chrome...


I've been playing a fair bit of historical stuff lately, including playtesting the provisionally titled "Comitatus" (Historical version of my Warband Fantasy rules), which you can find elsewhere on this blog.  I've also got several modelling projects running, as well as the usual roster of boardgames and roleplaying that fills my time when not engaged in the necessities of "real life".


But recently my group and I picked up a wonderful little game called Gaslands: Refuelled.  Yes, I know we're late to the Gaslands party, but "better late than never" as they say, and so far we're having tremendous fun with it.


I'm not going to review the game particularly, other than to say that it is a highly accessible wargame.  Given the premise and background of the game (post-apocalyptic vehicular arena combat*) suitable terrain is easily made from just a table top and household objects, and a few small toy cars.  Of course, you can also go all in and make a full table, converted cars etc., which I'll be doing.

The rules are also very well written and appears so far to be a well balanced and stable set.  They are similar to the proven design successes like FFG's X-Wing game, with simple die rolls, templated movement, and a customisation wrap-around that can be as simple or complex as you like.

The core setting has you playing a team in a televised vehicular death match; sort of a mash-up between Mad Max and banger racing.  Lots of scope for fun and games!

If you want a review there are many available.


Anyway...

So far, I've put together a couple of cars.

This one is a simple effort.  I liked the "out of the box" paint scheme on it and decided to keep it, but obviously it needed to be roughed up a bit and the vehicle needed some armaments.  I glued on a plastic gun (chopped from a Games Workshop space marine figure), some bits of railway model "corrugated iron" plasticard, and painted these to look rusty.  I then use ink washes to grubby it up a bit and painted some spots of edge rust, and called it done!  For cars I find with a good paint scheme I want to keep, it seems this technique will work fine.


This one, I wanted to try the full paint job.  I figured this would be a "ramming" specialist so I simply added a few spikes and a cover for the engine, gave it a rusted up paintjob and its good to go.  I didn't strip the existing paint but just went on straight over it.  It seems to work fine so I'm happy to plough on with other vehicles.


This one I shall call Ramm Stein.
I've also made a start on some proof of concent scatter terrain, basically using household junk, cardboard (cerial packets are perfect for this), and bits and bobs plundered from my extensive modelling "bits box".  Superglue, PVA glue, and some basic acrylic paints help finish the job.


I really liked making these, but I think I'll back off a bit on the complexity, and make some simple shanty town buildings to get a bulk of terrain done.  I want enough to fill at least two tables as there are 6-7 playing in our group and we're looking at splitting the games into two groups.  I'll also maybe do some bill boards and race track barriers.  If I can find some super cheap toy cars, I might bash them up into rusted piles of car chassis, too.  One of the marvellous things about Gaslands (as with other setting-driven games like A Very British Civil War) is that you can let your imagination and creativity go wild!  I'll be looking out for cheap, tacky toys to make into "arena of death" scenery.

Usually with a new project like this, we'd build/paint/prep everything first before playing.  We were so keen to start with this one though that we've kicked off with a few games so far, with unpated cars and improvised scenery (so not particularly visually exciting - hence no game photos).  I must say that every game has been a blast!  Great fun has been had by all with some real belly laugh moments of chaotic gaming mayhem.  


Of course we're steadily building up the scenery to look decent and once we're there, I'll photograph some games and post them up.  

I keep thinking I need to make the leap into vlog work at some point...

* Although the rules also basically say you can use the rules for any similar race/combat setting!

Saturday, 3 August 2019

Warband Historical Playtest: England vs Scotland

A few years ago I wrote and published a modest little fantasy wargame called Warband.    Since then I've been steadily developing other games that will hopefully one day get out into the wild, including what I'm currently calling "Warband Historical" (a better title will be sought!  I'm currently considering "Comitatus")  Anyway, its taken a lot of work so far, including design, playtesting, redesign, playtest, redesign, etc.

Last week we played a game between Alexander the Great and King Porus.

This week we decided to go with a high Medieval battle between the Kingdoms of England and Scotland, with two standard sized Warband armies, at 500pts apiece.  

The English were created from the list "Britain, English [1182-1337AD]", and consisted of:

Richard I (in command)
5 units of heavy knights (one with a sub-commander)
3 units of longbowmen
1 unit of archers
2 units of spearmen


The Scottish were created from the list "Britain, Scottish Medieval [1125-1513AD]", and consisted of:

William the Lion in schiltron (in command)
4 units of schiltron spears
2 units of archers
2 units of spearmen
2 units of knights (one with a sub-commander)
1 unit of light archers


(We forgot to bring baggage elements!)

We generated the terrain and on the western flank there was a small hill and a couple of areas of waterlogged ground; otherwise the eastern flank was a large open area of good ground.  Perfect for the heavy troops of both armies!


Then we generated the season and weather to find the battle being fought in spring, near a town somewhere in the northern marches.  As typical for this part of the world, it was raining and had been for a while and so another area of marshy ground terrain was randomly placed.  As it turned out it fell on the western flank too!


The two armies arrayed and ready for battle.
The mighty Scots schiltron; deep formations of spearmen.

The rest of the Scots line, formed up among the rough terrain,
Richard I himself, at the western end of the English line.  
The battle opened with the English longbowmen advancing into range of the Scots amid the sodden ground the west.  The Scottish light archers came out to cover the advancing schiltron formations.  And advance they did!  With the Scottish general among them, the heavy speanmen made sirprisingly good progress, moving to dominate the centre of the eastern battle.


In what would become a familiar action, the longbowmen shot the Scottish skirmishers to bits, routing them and forcing them to flee.


The schiltron
The Scottish schiltron was a dense array of heavy spearmen armed with a mix of long spears, pikes, and polearms.  They typically deployed in linear formations but could also take to the field in circular fashion.  they were particularly effective at defeating enemy mounted troops.


These heavy Scottish troops advanced into the English knights arrayed before them.  The knights, seeing the clattering spears, immediately turned and marched west, to try to avoid battle here.  In a typical display of feudal squabbling however, the move was uncoordinated and many of the straggling knights were caught in the open.


As the schiltrons closed into melee range, their formation broke up and the general's command capacity began to break down.  Although they did good work among the English knights, the schiltrons' inherent lack of mobility saw them struggle to manoeuver under their unit leader's commands.

The rest of the Scottish line stepped forwards to attamept to pin the English western line; but frankly all they did was make themselves targets for the lethal English longbows!


And the English longbows made hay among the Scots for sure.  Thelongbows and spearmen turned east to protect the retreat of their knights, and also to pour devastating volleys into the schiltrons.  


The schiltron formation breaks down and loses mobility,
although it massacres the English knights who couldn't get away.
Meanwhile the English archers and longbows begin to dominate the centre ground,
routing the Scottish pikes.

The knights beaten, the Scottish general now struggled to restore order or
get his schiltrons to move at all!  The Scottish advance grinds to a halt...
 The English knights that escaped had reorganised, linked up with their infantry, and now turned back to charge the schiltrons while they were in disarray.  This was still no small task as the Scottish pikes were a formidable opponent, but at least now the more mobile knights could pick their targets.


The tide of the battle starts to turn, as the English forces now smash into the schiltrons.  Knights and speamen mix it up in melee as the archers scatter and rout half the Scottish pikes.


The tide is turning...

..and the English take the centre ground.

But both armies have taken heavy losses in the bitter fighting and both are close to morale collapse.  Its still all to play for at this stage.  The surviving schiltrons, including the Scottish general, prove more than a match for the English, and start to get the upper hand, breaking the English spearmen and tearing the knights to shreds.

Richard I orders his longbowmen forwards into the western end of the Scottish lines, where for most of the day they'd hidden behind a hill to avoid the devastating English archery.


Both sides are now looking for those final few casualties that would break the opposing army and secure the win.

The English archery starts to tell and the Scots fall back in disarray.


Richard himself leads the charge, spurring on his archers, and as the two lines close, losses mount and in the same turn both armies break!

The result couldn't be closer and we tally the losses to see which side has scored the Pyrrhic victory...


And by about 25 points, the Scots drag out a bitter, attritional win!

All round it was an excellent battle with the fortunes of war swinging back and forth throughout the game.  The Scottish had the better of the early game with the schiltron winning the eastern flank.  The English recovered well and mounted a solid counter attack as the schiltron lost control and all but stopped moving.  And in the final phase, it was a stand-up, knock-down brawl with both sides giving no quarter.  It really could have gone both ways and it was all down to the losses inflicted in the final count.

Rules review I was pleased the way the various units interacted.  The schiltron clearly beat the knights, but the English longbowmen caused havoc among the schiltron in return, especially with King Richard personally taking command of them and inspriing their archery.

Both armies had their commanders on one flank (the opposite to each other as it happens), and both sides found this a significant difficulty as they couldn't spread their command points where they were needed effectively.  Sub-commanders were in play which helped a little.

Its fair to say that during the excitement and heat of battle, we all forgot and missed a variety of conditional modifiers and combat factors; the main effect of which was to extend the length of the game by about 3-4 turns.  Both armies would probably have broken earlier.

Next week - Mongol Golden Horde vs the Seljuk Turks.