The morning of 2nd June 1939 at Barlow Village broke in relative calm after the action of the 1st June. The Black Horse in Barlow had done a roaring trade last evening as the victorious chaps of the Lord’s Alliance celebrated pushing the Chopwell Reds out of their positions. The taps were drunk dry. Overnight the Gateshead supply trucks had brought in plentiful ammunition as their merry soldiery, together with Lord Lambton’s Hounds dug into fresh positions. Their commanders had instructions to hold the bridgehead as best they could while reinforcements were brought down from Winlaton. Unfortunately, mechanical issues and a lack of fuel stalled these precious reserves and by daybreak an understrength force remained at Barlow. They had clear orders to keep Barlow Road open and clear for the next push into Chopwell-held territory.
The Chopwell Reds had not been idle either. The command HQ at High Spen was in uproar as disputes and bitter recriminations between the Harding loyalists and moderates flew over the planning tables. The Lord’s Alliance attack had been unexpected and much of the Chopwell strength was concentrated to the south around their continued efforts to break through into Durham. The lost of what had been considered a ‘safe’ outer defensive position at Barlow was causing panic. Despite this, the efficient administrative functions of the Chopwell forces brought up ammunition trucks, and raised what militia they could to mount a counterattack and retake Barlow Village. On home ground, the Chopwell forces were able to sneak forwards in the night to try to trap the Lord’s forces in Barlow by cutting off Barlow Road, and thus an envelopment action was in the offing. The armoured reserve at High Spen was released to support the attack.
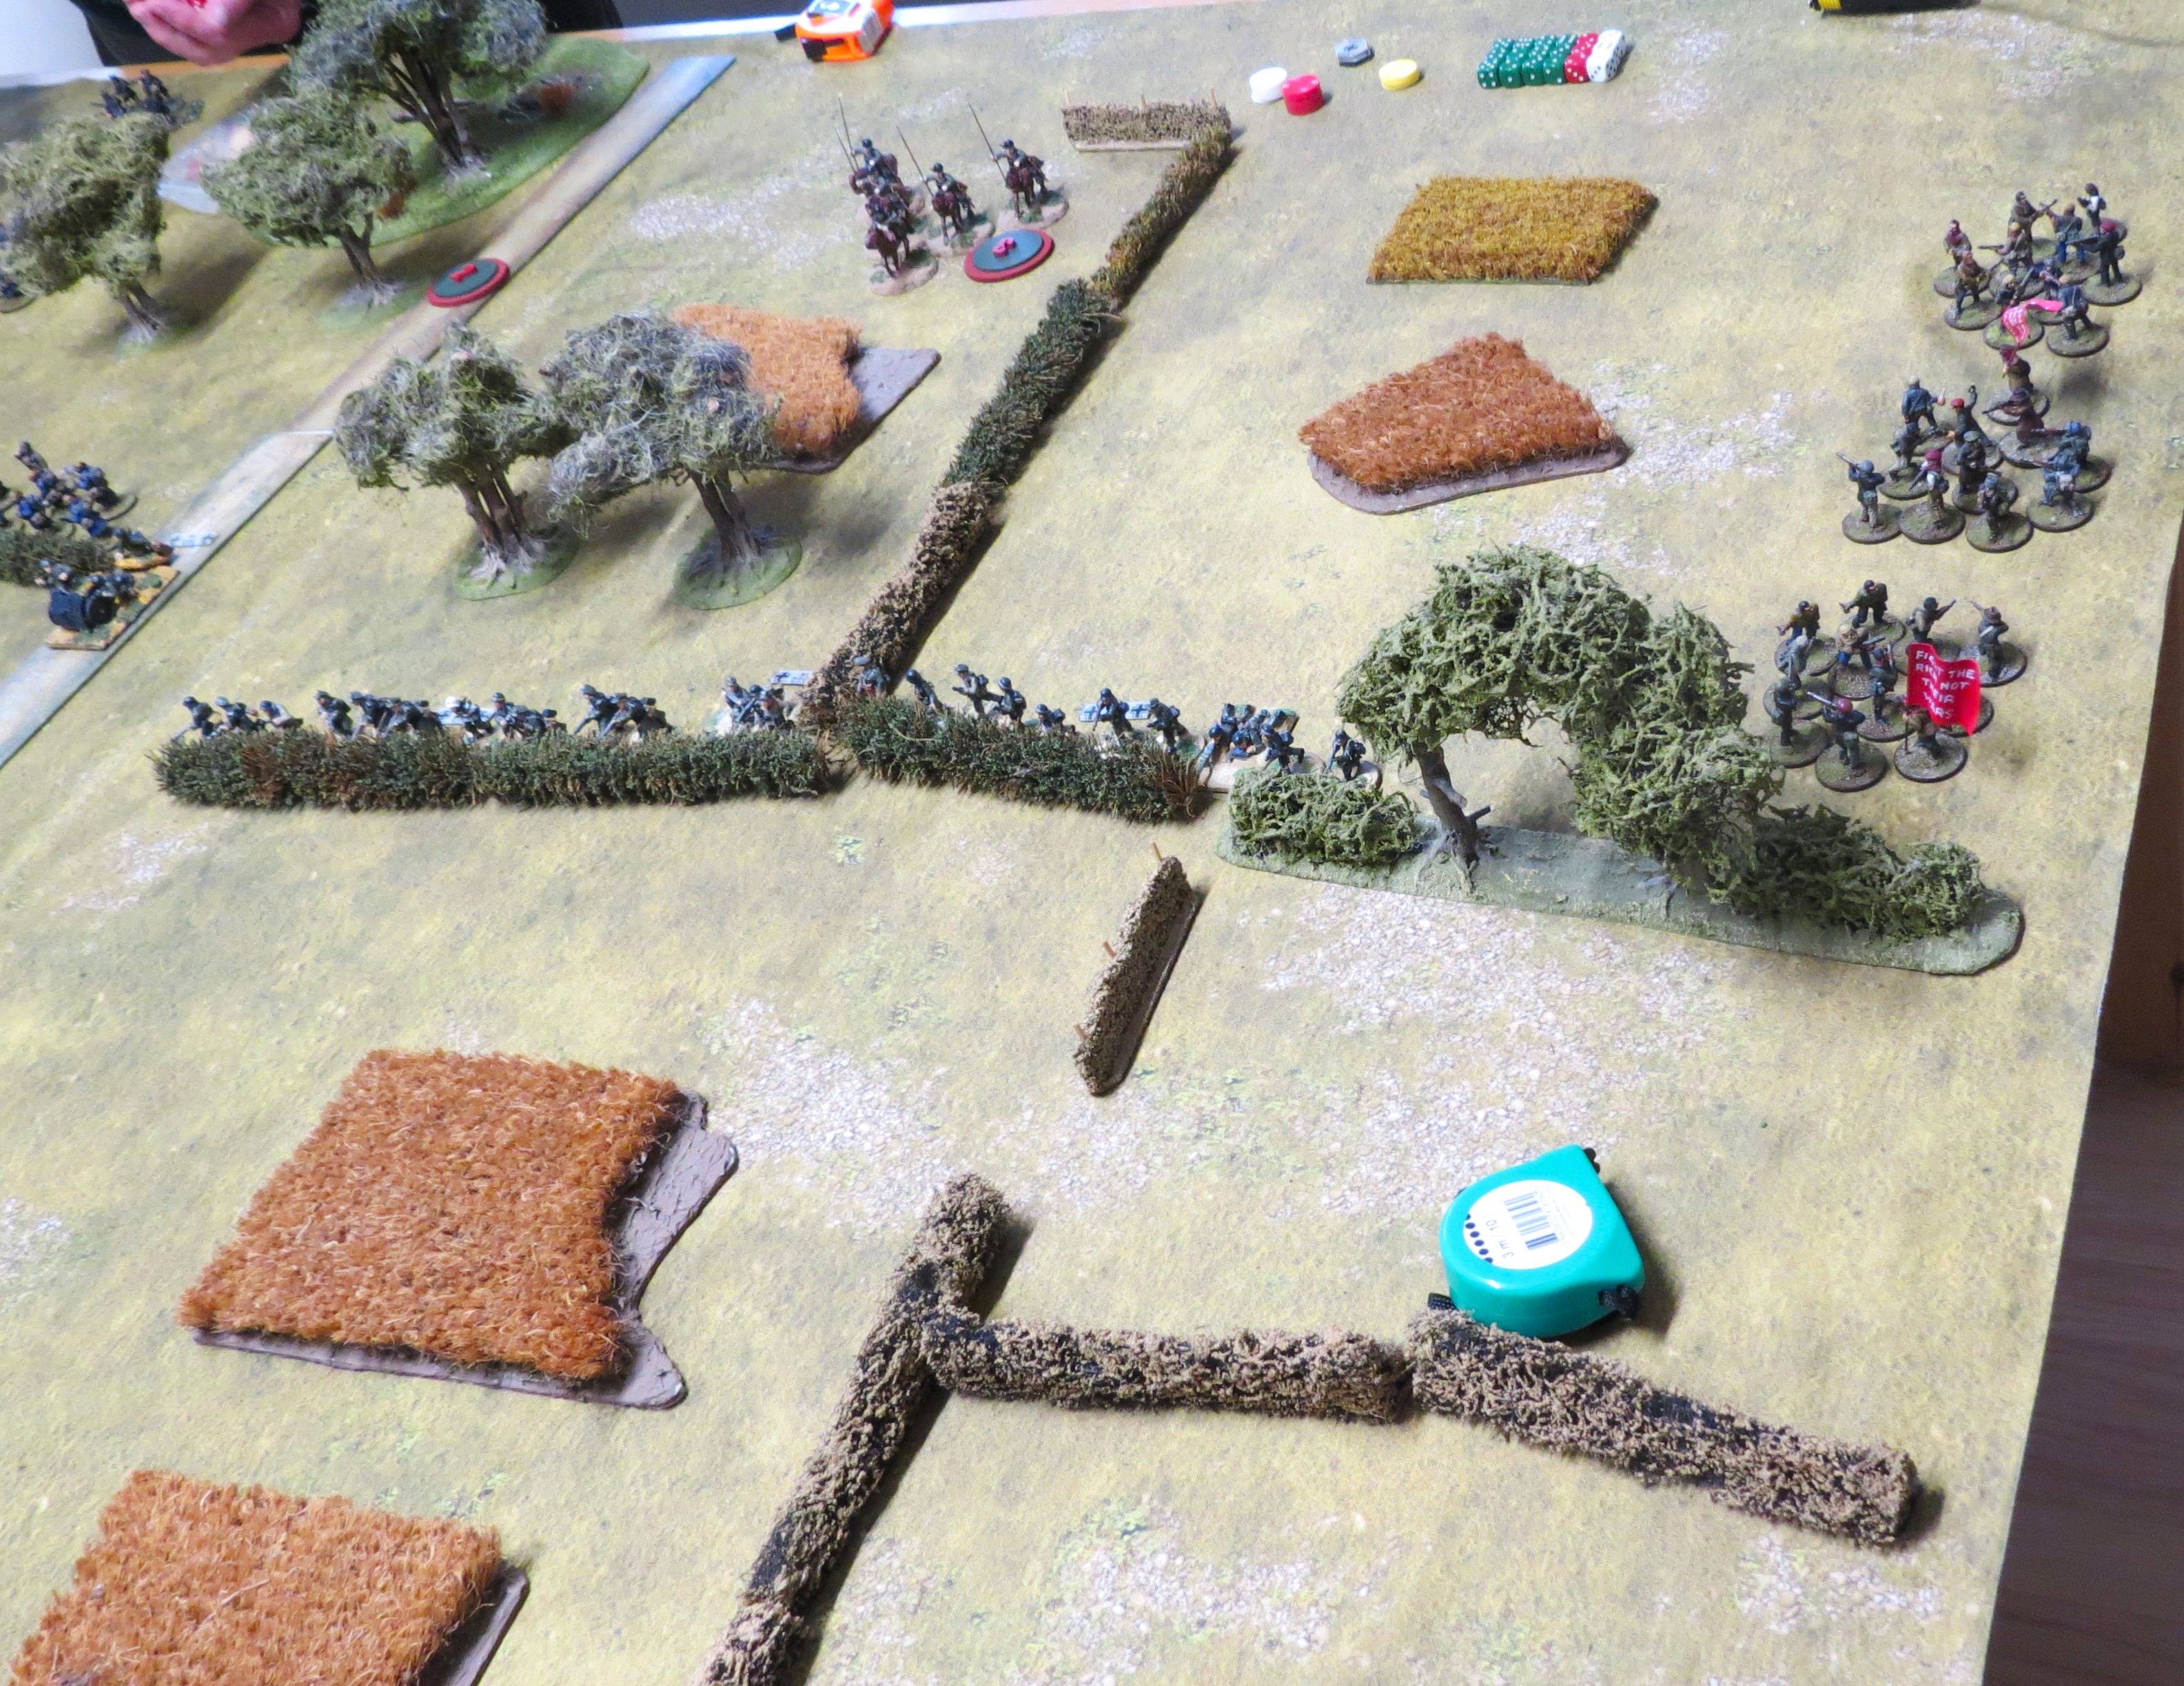
At dawn, as a local cow herd wandered into the area (having escaped from their field due to yesterday’s shenanigans), the hastily raised Red forces began their attack against the dug in Lord’s Alliance regulars. The regulars has pulled back and dug in to the north-east of the village itself to defend the road, so the battle was going to be a race for the Communists to get forwards quickly.
The main Red forces arrived up Pawston Road to find the Lord's Alliance dug in on Barlow Road.
The attack began from the south as a force of rioters (armed with pistols and firebombs) and local volunteers (with shotguns) stormed out of cover into the Gatehead regulars flank.
Across the road to the north, another Red flanking move advanced quickly into the Lambton position, supported by a barely functioning Vickers tank.
The main Chopwell force watched in dismay as their flanking forces attacked earlier than planned. The leaders here spurred on their troops to cross the village as quickly as possible.
To the south, the rioters had early success, swarming into melee and routing half the Gateshead regulars, and driving off their lancer cavalry. But their actions were costly and as the Gateshead lads reacted, the disciplined rifle fire supported by a Vickers machinegun shredded the Red flank. A couple of chaps were killed, many wounded, and the rest panicked and quit the field under such sustained fire.
The situation was similar to the north with the Red infantry routed off after an initial success in driving off the Lambton militia. Shortly after, peppered with rifle fire the tanks crew panicked, bailed out and left the damaged vehicle in the field.
At least this action had occupied the Lords defenders allowing the main Red force to advance quickly and relatively unhindered.
The cows had wandered into the village. This was to cause the Reds advance on the norther front to stall somewhat. There may be a war on but there's no sense in risking the local cattle so the cow herd formed an impassable barrier that could neither be moved or fired through!
The Chopwell forces to the south soon came within range of the Gatehead rifle fire and as they advanced quickly, they suffered terribly from this shooting. the cavalry were routed by the Vickers team and the infantry were chopped up.
The T26 tanks however, pushed on around the flank, intent to get onto the objectives at Barlow Road, while their supporting infantry dealt with the Gateshead regulars.
The Reds here assaulted the dug in regulars, while a unit of militia sprinted on though the gap along the road between the Gateshead crew and Lambton's Hounds.
One of the T26's came under sustained Vickers and rifle fire, damaging its tracks and panicking the crew, who abandoned their charge and fled the field. The other T26 did manage to bypass the position though and got to the objective, threatneing the cut of the Lord's positions.
Comment: The victory conditions for the battle were control of the three objective markers at the end of Turn 8. With this move by turn 6, the Chopwell Reds now controlled 2 of the 3 objectives.
To the north of the road, Lambton's Hounds were keeping the Red advance at bay. The tank here had been damaged and taken out of the fight, and delayed by the cow herd, the Red infantry was struggling to make headway.
In the centre the Chopwell rush was halted by close range light field artillery fire. Knocked about, and with many casualties, the Red force here petered out. the wounded crawled back towards the village looking for aid.
With the road cut, the Gatehead position relocated their Vickers team and sprayed the T26, knocking it out with a hit on the fuel tank. Luckily, the tank was practically empty and the tank was running on fumes so it didn't brew up. The crew still panicked and ran off to the south.
It was here, in the final turn that the game was decided. The Reds had cut the road but the Gateshead crew were able to take it back for the win, by withdrawing their Vickers team to retake the objective. However, the Red unit to the north of the road had advanced to a position where their Lewis gun was in range and in an amazing long ranged volley they managed to hit the Vickers crew and pin them!
By the absolute narrowest of margins the Reds managed to squeak a win, retaking Barlow Village and forcing the Lord's Alliance regulars to retreat in good order back along Barlow Road to Winlaton.
Comment: This was an incredibly brutal and tightly fought battle, and immensely enjoyable as victory came down to the final attack and final morale die roll of the game! Both sides were basically shattered, and although the Lord's Alliance regulars remained in a better state, with the Reds winning by controlling two of the three objectives, it felt more like a draw than a win. We've been playing AVBCW for years now, using various rule sets, and it never fails to be a fun time! We might go for a smaller skirmish action next time.
Of all the rulesets we've used One Page Rules has been very good. Simple, robust, and gives a good, swift game. For this battle with included the 'Overwatch' special action, which the Lord's Alliance forces made great use of.
________________________________
SCENARIO RULES
Day
2 (2nd June) – Loyalists won day 1. Counterattack.
With the Loyalists capturing
Barlow village they are spent and hunker down for the night to rest, recover
and rearm. Materiel is withdrawn to the rear for repairs and refuelling, and
only a partial infantry forces is left to garrison the village.
However, the Reds had drawn
up reserves for a swift counter assault which comes at dawn before the
Loyalists are able to muster for the next push.
Controlling the surrounding countryside, their aim is to encircle and
cut off the Loyalists in Barlow.
Game
length: 8 turns Table set-up: see
plan
Objective
Markers
On Barlow Road
12” in from the Barlow Road table edge
At the Crossroads
in Barlow
Placed anywhere
by the Loyalists, at least 9” from either objectives 1 or 2.
Victory
points (scored at the end of turn 8)
Each objective marker scores
1VP for either side.
Red
Forces
Each Red player has 1500pts
to construct their force.
The force may include
infantry, civilian vehicles, and armoured vehicles.
Loyalist
Forces
Each Loyalist player has 1000pts
to construct their force.
The force may include
infantry and civilian vehicles, but not armoured vehicles.
Prepared positions: Any Loyalist infantry may begin the game “dug in”.
They count as in cover until they move.
Deployment
Loyalists: Deploy first.
Their baseline is the Barlow Road table edge. They may deploy anywhere
up to Barlow Lane, but not within 12” of any table edge. They cannot ambush
or scout.
Reds: Deploy second. Their baseline if the Pawston Road
table edge. They may deploy anywhere up
to 12” in from the Pawston Road table edge. Each Red force may deploy up to
three units within 6” of either table edge between Barlow Land and the Barlow
Road table edge. They cannot ambush or scout.